| English / Deutsch | Print version |
Plop Linux - Live Version
Table of Contents
Introduction
The Live version of Plop Linux can boot from CD, DVD, USB flash drive (UFD), USB hard disk or from network with PXE. Basically, you can do anything, but you need some experience with Linux.
Current stable: 26.2 for i486 (32-bit) and x86_64 (64-bit)
Other versions: Desktop, Server, ARM
System requirements for the Live version
- Intel i486, x86_64 compatible processor
- 64 MB RAM
Features
- booting from CD/DVD, USB and network
- current Linux Kernel versions
- 32-bit and 64-bit versions
- fast booting
- sshfs
- NTFS read/write with ntfs-3g (except compressed and encrypted files)
- add your own scripts
- IDE, SATA, SCSI, and RAID support
- Partimage to save or restore partitions
- pimgrestore
- proftpd server
- SSH connections
- Samba connection
- NFS connection
- Xfce, Fluxbox
- btrfs
- vmstat
- systat package
- fsarchiver
- mbuffer, udpcast, multicast
- partclone
- memtest
- cryptsetup luks
- TFTP (tftpd)
- xinetd
- DHCP server
- testdisk, photorec
- Plop Boot Manager
- nmap
- perl
- LILO, GRUB, Grub2, Syslinux
- chntpw, reged
- chkrootkit
- Bluetooth
- wake on LAN (wol, ether-wake, ethtool)
- many network tools
- Network connections to windows network shares, FTP servers, Web servers or SSH connections.
- Wi-Fi
- dm-crypt
- vnc, gparted, firefox, ...
- Flash player, LibreOffice, OpenOffice
- Boot from NFS, Samba, TFTP, FTP, HTTP
- ISO boot
- Support for blind people (brltty, Orca)
And much more...
Screenshots
Boot menu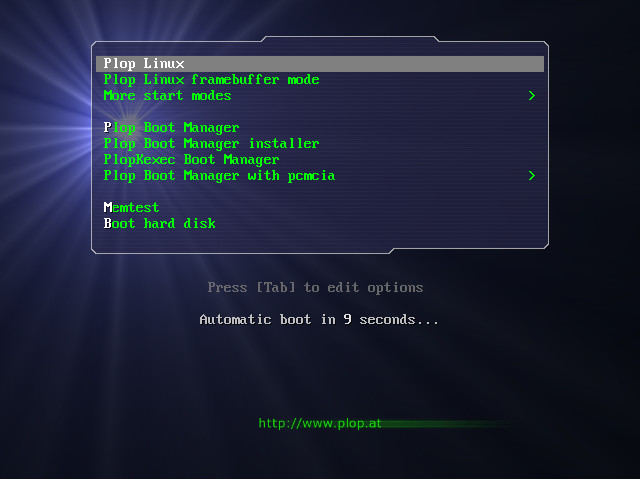 zoom |
Console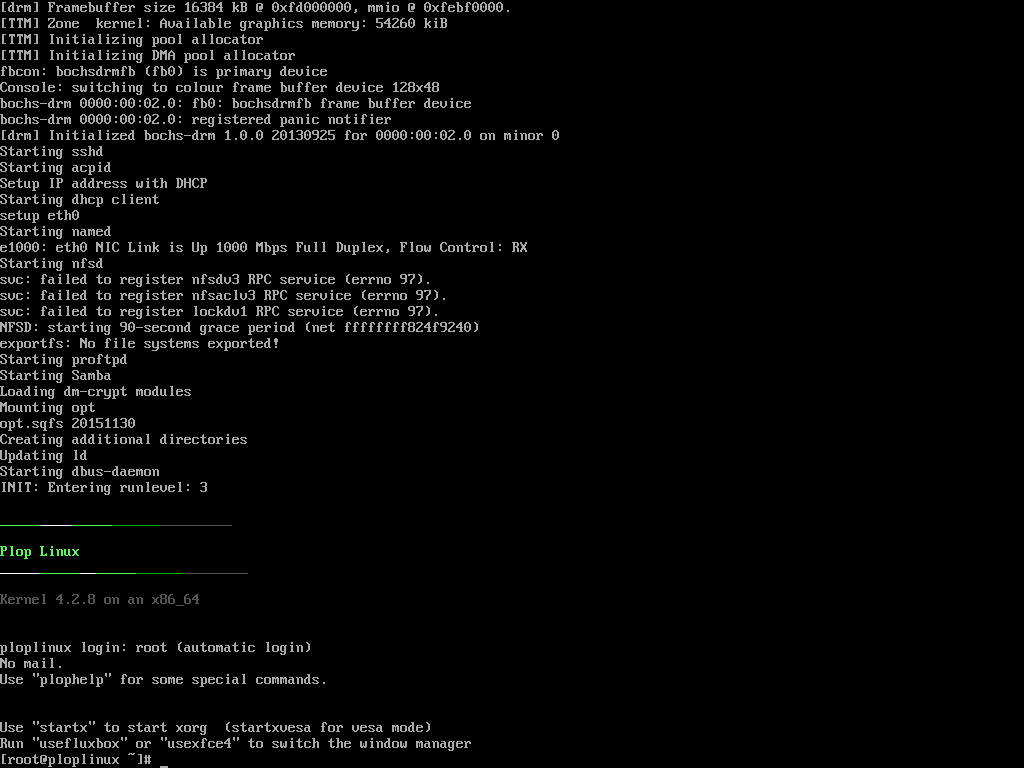 zoom |
Console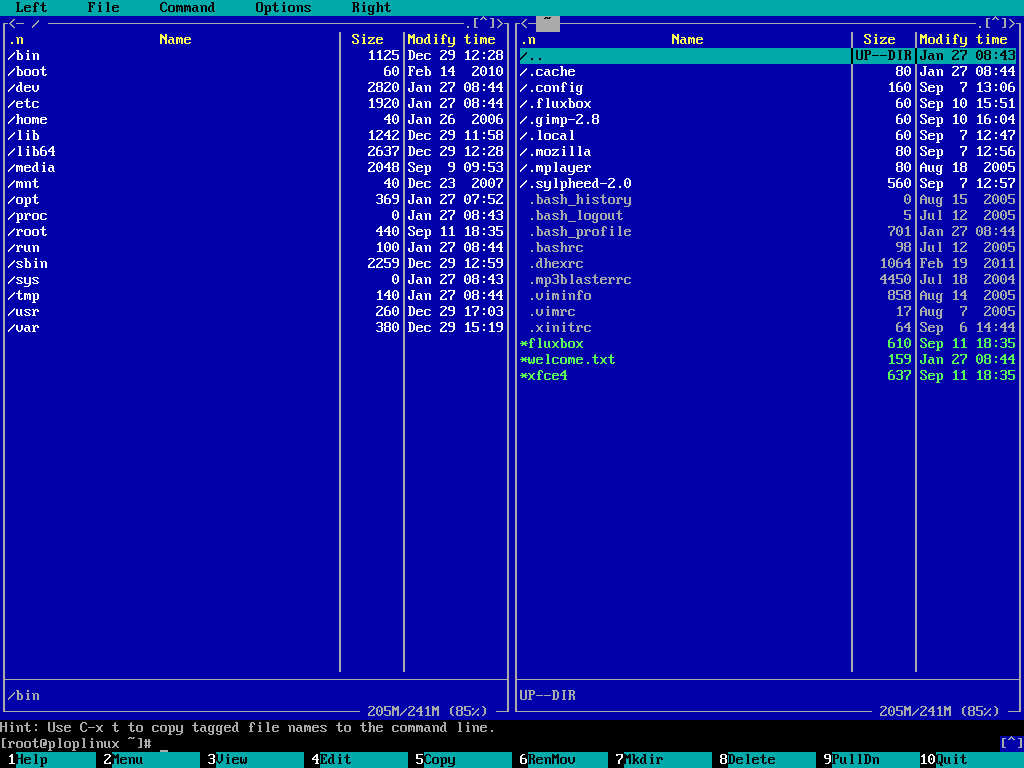 zoom |
||
Xfce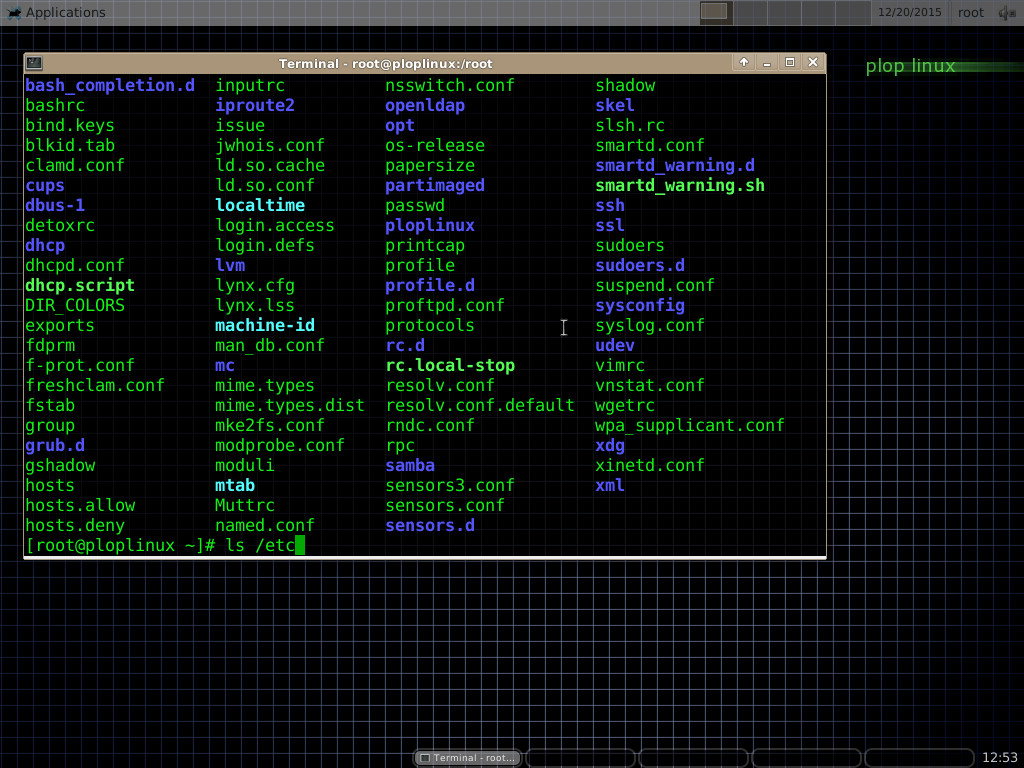 zoom |
Xfce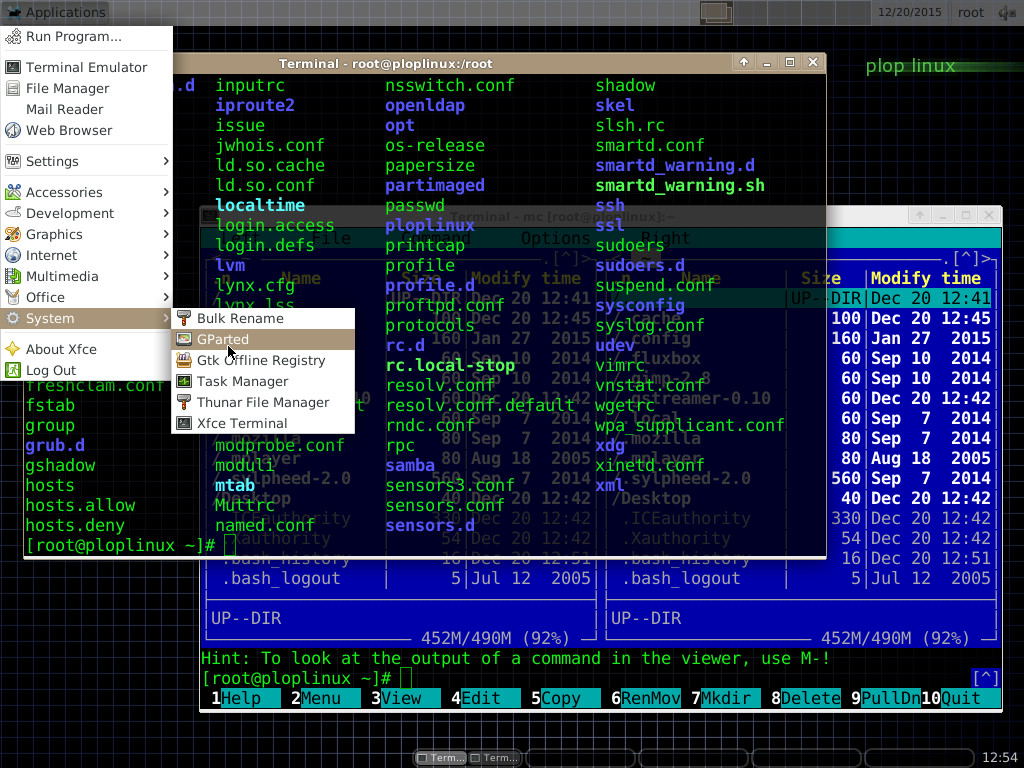 zoom |
Fluxbox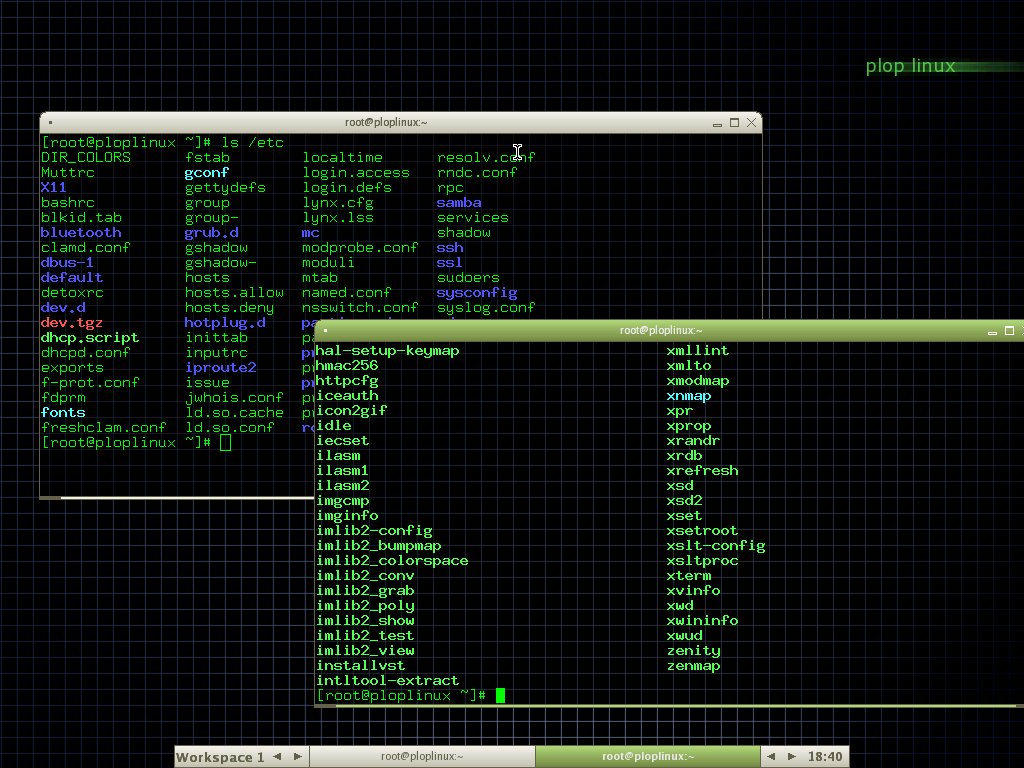 zoom |
||
Download
Current version: 26.2, 07/Apr/2026
Plop Linux License, Changelog, Package Changelog, Source Codes, Program Packages, md5sum
| Edition | 32-bit, i486 | 64-bit, x86_64 | |
| Standard | iso, tar.gz, zip | iso, tar.gz, zip | 4.79 GB |
| Small | iso, tar.gz, zip | iso, tar.gz, zip | 559.89 MB, size reduced - without Xorg, GCC, MAN, Python |
| BRL | iso, tar.gz, zip | iso, tar.gz, zip | 5.46 GB, for blind / visually impaired users |
Network Boot Files
| PXE network boot configuration / directory structure | tar.gz, zip | 351.06 KB |
| Linux configuration files | tar.gz | 3.43 KB |
| Full Sample | tar.gz | 4.64 GB |
| Full Sample - with ISO | tar.gz | 4.71 GB |
Additional tools
| syslinux.exe | 239.00 KB | |
| mkisofs.zip | 842.52 KB | mkisofs.exe, plpmkisofs.exe |
| make-iso.sh | 592 | |
| genfilelist.exe | 28.91 KB | |
| genfilelist-0.1.zip | 10.59 KB | Source Code |
| office_live.sh | 3.16 KB | Add office to opt.sqfs |
| install_office.sh | 2.30 KB | Office installieren |
Source codes, release tools
| Web directory | Source Codes | |
| Compile scripts only | ploplinux-nosrc-26.2.tar.gz | 52.98 MB |
| Source code files, compile scripts | ploplinux-src-26.2.tar.gz | 6.05 GB |
| Release tools and scripts | ploplinux-release-26.2.tar.gz | 311.00 MB |
Create a LiveCD
The download links in this description are for the 64-bit version. To create a 32-bit version use the corresponding files from the download area.
| 1. Linux: Create a Plop Linux LiveCD |
| 1.1. Burn an ISO image |
| 1.1.1. Burn on CD |
| 1.1.2. Burn on DVD |
| 1.2. Create a new ISO image |
| 1.2.1. Download and extract |
| 1.2.2. Adding files |
| 1.2.3. Create the ISO image |
| 2. Windows: Create a Plop Linux LiveCD |
| 2.1. Burn an ISO image |
| 2.2. How-to create a new ISO image |
1. Linux: Create a Plop Linux LiveCD
- Pro: You have to burn it on a CD as it is and it's possible to boot.
-
Contra: No anti-virus license and no antivirus database comes with
the ISO. That means no F-PROT or Avast is available.
No personal files or scripts from you are on the CD.
There are 2 solutions to boot from CD/DVD. The first solution is to use the existing Plop Linux ISO image.
If you don't need any personal files, F-PROT or Avast, then you can use it. If you want more power, then you have to create your personal ISO image in a few steps. That's the second solution.
1.1. Burn an ISO image
You have to download the file ploplinux-26.2-x86_64.iso
K3b is an easy to use GUI for the Linux burner programs. You can simply burn the ISO to a disc with a few mouse clicks.
If you prefer the command line, then use the following commands.
1.1.1. Burn on CD
cdrecord is the Linux tool to burn CD ISO images.
Burn the ISO with cdrecord:
cdrecord -v dev=<devicename> <iso image>
Example:
If your cd writer drive is /dev/hdd.
cdrecord -v dev=/dev/hdd ploplinux-26.2-x86_64.iso
1.1.2. Burn on DVD
growisofs is the Linux tool to burn DVD ISO images.
Command:
growisofs -dvd-compat -Z <devicename>=<iso image>
Example:
If your dvd writer drive is /dev/hdd.
growisofs -dvd-compat -Z /dev/hdd=ploplinux-26.2-x86_64.iso
1.2. Create a new ISO image
You need mkisofs or genisoimage to create an ISO file. Prefere genisoimage.
1.2.1. Download and extract
You have to download the file
ploplinux-26.2-x86_64.tar.gz to your
home directory.
Then extract the downloaded file.
tar xfvz ploplinux-26.2-x86_64.tar.gz
1.2.2. Adding files
The directory ploplinux-26.2-x86_64/ with the Plop Linux directories and files is created and you can add your personal files and the F-PROT and Avast files to the ploplinux/opt/ directory. Executable files should be placed in ploplinux/bin/.
1.2.3. Create the ISO image
The following command creates the ISO image with genisoimage. The parameters are the same with mkisofs. Run it from the command line in your home directory.
genisoimage -J -r -V ploplinux-26.2-x86_64 \
-hide-joliet-trans-tbl -hide-rr-moved \
-allow-leading-dots \
-o ploplinux-26.2-x86_64.iso -no-emul-boot -boot-load-size 4 \
-c syslinux/boot.catalog -b syslinux/isolinux.bin \
-boot-info-table -l ploplinux-26.2-x86_64
You can download the script make-iso.sh when you don't want to type the whole stuff.
Run 'sh make-iso.sh 26.2-x86_64' from the command line in your home directory to create the ISO image ploplinux-26.2-x86_64.iso.
When creating the ISO was successful, then burn it. see 1.1. Burn an ISO image
2. Windows: Create a Plop Linux LiveCD
- Pro: You have to burn it on a CD as it is and it's possible to boot.
-
Contra: No anti-virus license and no antivirus database comes with
the ISO. That means no F-PROT or Avast is available.
No personal files or scripts from you are on the CD.
There are 2 solutions to boot from CD/DVD. The first solution is to use the existing Plop Linux ISO image.
If you don't need any personal files, F-PROT or Avast, then you can use it. If you want more power, then you have to create your personal ISO image in a few steps. That's the second solution.
2.1. Burn an ISO image
You have to download the file ploplinux-26.2-x86_64.iso or use your own ISO file.
You can use Nero, the free CDBurnerXP or any other burner program that supports "burning ISO images".
Use an option like Burn ISO to Disc or Copy ISO to Disc. Then select the Plop Linux ISO image and burn it to the disc.
2.2. How-to create a new ISO image
-
Download the zip file mkisofs.zip. It contains the required binaries of cdrtools-latest.zip from the cdrtools homepage and the program plpmkiso.exe.
-
Extract mkisofs.zip to your hard disk. Remember the folder you are extracting the files.
-
Download ploplinux-26.2-x86_64.zip to your hard disk and extract the files into the mkisofs folder.
-
When you open the mkisofs folder, then you should see the ploplinux-26.2-x86_64 folder and some files like mkisofs and plpmkiso.
-
Change to the ploplinux-26.2-x86_64 folder.
You can add your files to the ploplinux-26.2-x86_64\ploplinux\opt\ folder. See F-PROT or Avast to add the antivirus files to your CD.
-
Create the ISO with mkisofs. Run the program plpmkiso.exe. Enter the Plop Linux version you want to create (26.2-x86_64). Now my program runs mkisofs with the required parameters and creates the ISO image.
When everything is ok, then a new ISO file is in your mkisofs folder. Ex. ploplinux-26.2-x86_64.iso.When you want to create it by hand. The mkisofs parameters are
mkisofs -J -r -V ploplinux-26.2-x86_64 -hide-joliet-trans-tbl -hide-rr-moved -allow-leading-dots -o ploplinux-26.2-x86_64.iso -no-emul-boot -boot-load-size 4 -c syslinux/boot.catalog -b syslinux/isolinux.bin -boot-info-table -l ploplinux-26.2-x86_64
-
Burn the ISO image. See 2.1. Burn an ISO image.
plpmkiso.exe is outdated, a new version comes soon! You have to create the ISO with mkisofs. See 6.
mkisofs.exe is the required tool to create a ISO image. It's a part of cdrtools.
Bootable USB drive
| Automatic with a third party tool |
| Step by step with Linux |
| Step by step with Windows |
Automatic with a third party tool
Linux: MultiBoot LiveUSB
Windows: Universal USB Installer, Linux Live USB Creator
Step by step with Linux
Requirements to make an USB drive bootable:
- File system on the device must be FAT. When you use EXT2/3/4 then you have to use extlinux instead of syslinux.
- The Plop Linux file ploplinux-26.2-x86_64.tar.gz
- The program syslinux
You have to do the following steps from a command line. Login as root (or do a sudo bash) to be sure to have all rights.
-
Plug in your USB drive.
- Run dmesg to determine which
device node is used for your USB drive. Linux need's a
few seconds to detect the USB drive.
Example output:usb 1-3: new high speed USB drive using ehci_hcd and address 3 usb 1-3: configuration #1 chosen from 1 choice scsi0 : SCSI emulation for USB Mass Storage devices usb-storage: device found at 3 usb-storage: waiting for device to settle before scanning scsi 0:0:0:0: Direct-Access LEXAR GEYSER JUMPDRIVE 1.00 PQ: 0 ANSI: 1 CCS SCSI device sba: 1001952 512-byte hdwr sectors (513 MB) sba: Write Protect is off sdb: Mode Sense: 23 00 00 00 sdb: assuming drive cache: write through SCSI device sdb: 1001952 512-byte hdwr sectors (513 MB) sdb: Write Protect is off sdb: Mode Sense: 23 00 00 00 sdb: assuming drive cache: write through sdb: sdb1 sd 0:0:0:0: Attached scsi removable disk sdb usb-storage: device scan complete
In this case, Linux use sdb as device name. The device can be used as /dev/sdb. This device has 1 partition called sdb1 (file name of the device node is /dev/sdb1). We use this partitions to boot with Plop Linux.
-
Mount the device to determine the file system. We use the directory /mnt/usb as mount point. If this directory not exists then create it.
mkdir /mnt/usb
Now mount the partition from the USB drive.
mount /dev/sdb1 /mnt/usb -t vfat
If mount fails withmount: /dev/sdb1 is not a valid block device
You are using the wrong device node.
If mount fails with
mount: wrong fs type, bad option, bad superblock on /dev/sdb1
The partition /dev/sdb1 (in my case) is not formatted with fat.
If mount reports nothing, then proceed with the next step. -
You have to download the file ploplinux-26.2-x86_64.tar.gz to your home directory.
Then extract the downloaded file.
tar xfvz ploplinux-26.2-x86_64.tar.gz
-
Copy the extracted Plop Linux files on you USB drive.
cp -avr ploplinux-26.2-x86_64/* /mnt/usb/
-
Now, the root directory of your USB drive should have the directories efi, ploplinux, syslinux.
Check this with: ls /mnt/usb
-
Unmount the USB drive.
umount /mnt/usb
-
Make the partition bootable with syslinux.
syslinux /dev/sdb1
-
Use fdisk to activate the boot flag for the boot partition.
-
fdisk /dev/sdb
-
Use the command p and enter to take a look at the partition table.
Example output:
Disk /dev/sdb: 512 MB, 512999424 bytes
16 heads, 63 sectors/track, 994 cylinders
Units = cylinders of 1008 * 512 = 516096 bytes

   Device Boot   Start   End   Blocks   Id  System
/dev/sdb1            1   994   500944+   e  W95 FAT16 (LBA)

Command (m for help):
Beside /dev/sdb1 there is no * below Boot. That means /dev/sdb1 is not activated for boot.
The Id should be e W95 FAT16 (LBA) or c W95 FAT32 (LBA) for partitions greater than 2GB. If you change the Id, you have to format the partition again. (You loose all data on the partition)
-
Change the boot flag for /dev/sdb1
Use a and enter.
Now select a partition between 1-4. In my case it's 1 (sdb1). -
Change the Id for /dev/sdb1 (only needed if there is a wrong Id)
Use t Now select a partition between 1-4. In my case it's 1 (sdb1).
Now enter e for W95 FAT16 (LBA) or c for W95 FAT32 (LBA) for partitions >2GB. -
Use p and enter to list the partition table.
Example output:
Disk /dev/sdb: 512 MB, 512999424 bytes
16 heads, 63 sectors/track, 994 cylinders
Units = cylinders of 1008 * 512 = 516096 bytes

   Device Boot   Start   End   Blocks   Id  System
/dev/sdb1   *        1   994   500944+   e  W95 FAT16 (LBA)

Command (m for help):
Now we can see the * beside /dev/sdb1
The command w writes the changes to the device and quits fdisk. If you don't want to save but quit then use q.
-
If you changed the Id, then format the partition. After formatting you have to copy all files again.
Format: mkfs /dev/sdb1, for fat32 use mkfs -F 32 /dev/sdb1
-
-
If the USB drive does not boot, maybe the program in the MBR is not ok. You can fix this with
lilo -M /dev/sdb
After those steps, you should be able to boot from USB with Plop Linux.
Step by step with Windows
Requirements to make an USB drive bootable:
- You must have administrator rights to finish all steps.
- File system on the device must be FAT.
- The Plop Linux file ploplinux-26.2-x86_64.zip
- The program syslinux.exe.
Let's start
-
Plug in your USB drive.
-
In my example, the drive letter of the USB drive is F:.
Check the file system. Use the right mouse click on F: and then Properties from the context menu. You can see now, how much space is left on the device and file system type. It should be FAT12, FAT16 or FAT32.
-
Extract the Plop Linux files from ploplinux-26.2-x86_64.zip on the USB drive.
The directories ploplinux and syslinux must be in the root directory F:\ of your USB drive.
-
Download syslinux.exe to your desktop.
Open the Command Prompt (in Accessories of your Windows menu).
Change the directory to your Desktop.
cd Desktop
Run syslinux with your drive letter as parameter.
BE SURE TO USE THE CORRECT DRIVE LETTER. If you use ex. C: then your windows will not boot up next time and you have to repair it with the windows rescue console.syslinux f:
Your usb drive should be bootable now.
It doesn't boot
When your device won't boot, maybe the boot flag in the MBR of your device is not set or a wrong partition ID is set. There can be a wrong program in the MBR too (but that's no problem to fix).
There are 2 ways to activate the boot flag and change the partition ID:
- With Windows
You need the program plppart32.exe. Save it in the same folder like syslinux. Switch to the Command Prompt. To determine which device number Windows is using for your USB drive run
mmc %SystemRoot%\system32\compmgmt.msc
Click at Storage and then at Disk Management. In the window right below you can see Disk 0 (your first hard disk), CD 0 (CD-Rom drive) and so on. Your USB drive is in the list too. If your device is Disk 2 then run from the Command Prompt in the folder you stored plppart32.exe to see the partition table the command
plppart32 -d 2 -i
Example output:
Using physical drive 2

Drive geometry:
  Media Type         : RemovableMedia
  Cylinders          : 62
  Tracks per Cylinder: 255
  Sectors per Track  : 63
  Bytes per Sector   : 512

NR  ID  BOOT    SS  SH   SC  ES  EH   EC   LBAST   LBASEC  SIZE
----------------------------------------------------------------------
1  0x0e          1   1    0  63  15   992     63  1001889 489.00 MByte
2  0x00          0   0    0   0   0     0      0        0 0.00 MByte
3  0x00          0   0    0   0   0     0      0        0 0.00 MByte
4  0x00          0   0    0   0   0     0      0        0 0.00 MByte
The device has a Media Type RemovableMedia. The boot flag of the first partition is not set. To set the boot flag for the first partition use
plppart32 -d 2 -p 1 -b 0x80
The partition type should be 0x0e or 0x0c for partitions greater than 2GB. If you change the partition ID, you have to format the partition again and do all steps again.
plppart32 -d 2 -p 1 -id 0x0e
If you take another look at the partition table, then the partition 1 should be changed below BOOT.
NR  ID  BOOT    SS  SH  SC  ES  EH   EC   LBAST   LBASEC  SIZE
---------------------------------------------------------------------
1  0x0e *[0x80]  1   1   0  63  15   992     63  1001889 489.00 MByte
If you changed the ID, then you have to format the partition and do all steps again. If you format, you lose all data on the partition.
Now you should be able to boot. If not, maybe the mbr program is not ok. You have to fix it with Linux.
- with Linux
Download the Plop Linux ISO image and burn it on a cd, boot up with Linux and see the Linux version 1.1. Make USB drive bootable step-by-step point 2, 10 and 11.
Boot from ISO
The ISO file can be on a local drive, a network drive, on a TFTP server, HTTP server or FTP server. See the "PXE boot" section for network examples.
You have to use the Linux command line parameter iso_filename. The ISO file is in the /iso directory.
| 1. GRUB2 example |
| 2. GRUB / GRUB4DOS example |
| 3. Syslinux example |
1. GRUB2 example
The Plop Linux related part of grub.cfg
menuentry "Plop Linux ISO" {
    echo Loading Plop Linux
    set isofile="/iso/ploplinux-26.2-x86_64.iso"
    loopback loop $isofile
    linux (loop)/syslinux/kernel/bzImage vga=1 iso_filename=$isofile
    initrd (loop)/syslinux/kernel/initramfs.gz
}
2. GRUB / GRUB4DOS example
The Plop Linux related part of menu.lst
title  Plop Linux ISO
map  /iso/ploplinux-26.2-x86_64.iso (hd32)
map --hook
rootnoverify (hd32)
kernel ()/syslinux/kernel/bzImage vga=1 iso_filename=iso/ploplinux-26.2-x86_64.iso
initrd ()/syslinux/kernel/initramfs.gz
3. Syslinux example
The Plop Linux related part of syslinux.cfg
label linux
    menu label Plop Linux ISO
    kernel syslinux/kernel/bzImage
    append initrd=syslinux/kernel/initramfs.gz vga=1 iso_filename=iso/ploplinux-26.2-x86_64.iso
PXE Boot from network (DHCP, TFTP, NFS, Samba, FTP, HTTP) - Linux server
The network boot will be explained with working example setups. When you understood the concept, then you can use your own server setups and directory structures. Everything is flexible and can be configured to be anywhere on your server.
The minimum requirements to boot from a network are a DHCP server and a TFTP server.
The access to the Plop Linux files can be via NFS share, Samba share, TFTP, FTP or HTTP.
Download a working sample with the full directory structure: netboot-sample.tar.gz, for ISO netboot-sample-iso.tar.gz
The download links in this description are for the 64-bit version. To create a 32-bit version use the corresponding files from the download area.
Basic conditions for this example setup:
- Network type: 10.0.0.x Netmask 255.255.255.0
- Server IP: 10.0.0.1
- Client IP: will be 10.0.0.250 from DHCP with MAC address
- TFTP root directory: /tftpboot
It works with other IP addresses too!
Here are config files for a Linux test system in an archive: pxeconfs.tar.gz
| 1. Setup |
| 1.1. Extract the Plop Linux files |
| 1.2. Setup the DHCP server |
| 1.3. Setup the TFTP server |
| 2. NFS |
| 2.1. Boot with NFS |
| 2.2. Boot ISO over NFS |
| 3. Samba network share |
| 3.1. Boot with Samba network share |
| 3.2. Boot ISO over Samba network share |
| 4. TFTP |
| 4.1. Boot only with TFTP |
| 4.2. Boot ISO over TFTP |
| 5. FTP |
| 5.1. Boot with FTP |
| 5.2. Boot ISO over FTP |
| 6. HTTP |
| 6.1. Boot with HTTP |
| 6.2. Boot ISO over HTTP |
| 7. Boot problems |
1. Setup
1.1. Extract the Plop Linux files
Extract the file ploplinux-pxeboot.tar.gz to your root directory.
tar xfz ploplinux-pxeboot.tar.gz -C /
Now you have the basic directory structure and files in '/tftpboot'.
Extract the file ploplinux-26.2-x86_64.tar.gz to '/tmp'.
tar xfz ploplinux-26.2.tgz -C /tmp
Move the files to '/tftpboot/ploplinux-netboot/'.
mv /tmp/ploplinux-26.2/* /tftpboot/ploplinux-netboot/
Now you should have the following directories and files
/tftpboot/
         /ploplinux-netboot/
                	   /boot.msg
                	   /memtest
                	   /menu.c32
                	   /spash.png
                	   /vesamenu.c32
                	   /pxelinux.0
                	   /ploplinux/
                        	     /bin/
                    		     /bin.sqfs
                        	     /etc.tgz
                        	     /lib.sqfs
				     /opt/
                        	     /ploplinux.version
                	    /pxelinux.cfg/
                            		 /default
			    /syslinux/
		        	     /kernel/
		                	    /bzImage
			        	    /initramfs.gz
		        	     /plop/
		                	  /plpbt.bin
			        	  /plpinstc.com
1.2. Setup the DHCP server
You need the DHCP server software. If your distribution has none then you can use
dhcp-4.4.3.tar.gz
(or search for the latest on the net) and
compile it.
This is the example DHCP server configuration.
The very important line is 'filename "/ploplinux-netboot/pxelinux.0";'.
subnet 10.0.0.0 netmask 255.255.255.0 {

        option routers 10.0.0.1;

}

allow booting;
allow bootp;

# Standard configuration directives...

option domain-name "plop";
option subnet-mask 255.255.255.0;
option broadcast-address 10.0.0.255;
option domain-name-servers 10.0.0.1;
option routers 10.0.0.1;

# Group the PXE bootable hosts together
group {
	# PXE-specific configuration directives...
	next-server 10.0.0.1;
	filename "/ploplinux-netboot/pxelinux.0";

	# You need an entry like this for every host
	# unless you're using dynamic addresses
        host testpc {
	        hardware ethernet 00:0C:6E:A6:1A:E6;
		fixed-address 10.0.0.250;
	}
}
To start the DHCP server simply run 'dhcpd'.
Note: For testing you can run 'dhcpd -f' to run dhcpd in the foreground and get some debug output.
Note: Change the 'next-server' IP to set another TFTP server IP.
1.3. Setup the TFTP server
Download the latest TFTP server from ftp://www.kernel.org/pub/software/network/tftp/ and install it with './configure --prefix=/usr && make && make install'.
To start the TFTP server we use Xinetd.
Here is the base Xinetd config file
File name: /etc/xinetd.conf#
# Simple configuration file for xinetd
#
# Some defaults, and include /etc/xinetd.d/
defaults
{
log_type = SYSLOG daemon info
log_on_success = PID HOST DURATION
log_on_failure = HOST
instances = 100
per_source = 20
}
includedir /etc/xinetd.d
And the configuration for the tftp server.
The important line is 'server_args = -s /tftpboot' for the tftp root
directory.
# default: off
# description: The tftp server serves files using the trivial

# file transfer \
# protocol. The tftp protocol is often used to boot diskless \
# workstations, download configuration files to

# network-aware printers, \
# and to start the installation process for some operating systems.
service tftp
{

socket_type = dgram
protocol = udp
wait = yes
user = root
#only_from = 10.0.0.1
server = /usr/sbin/in.tftpd
server_args = -s /tftpboot
disable = no
per_source = 11
cps = 100 2

}
To start Xinetd simply run 'xinetd'.
Note: For testing you can run 'xinetd -d' to run Xinetd in the foreground and get some debug output.
2. NFS
2.1. Boot with NFS
Requirements are the DHCP and TFTP Server (Setup).
Basic configs for your NFS server, without security aspects:
File name: /etc/exports
/tftpboot/ploplinux-netboot -no_subtree_check 10.0.0.250
File name: /etc/hosts.allow
portmap: 10.0.0.0/255.255.255.0
lockd: 10.0.0.0/255.255.255.0
rquotad: 10.0.0.0/255.255.255.0
mountd: 10.0.0.0/255.255.255.0
statd: 10.0.0.0/255.255.255.0
File name: /etc/hosts.deny
portmap:ALL
lockd:ALL
mountd:ALL
rquotad:ALL
statd:ALL
Parameter: nfsmount=NFSSHARE|ADDITIONALPARAMS
Example: nfsmount=10.0.0.1:/tftpboot/ploplinux-netboot
Example: nfsmount=10.0.0.1:/tftpboot/ploplinux-netboot|rsize=2048,wsize=2048,nolock,vers=2,hard,intr
File name: /tftpboot/ploplinux-netboot/pxelinux.cfg/nfs.conf
# Boot from NFS

label linux-nfs
    menu label Plop Linux - NFS
    kernel syslinux/kernel/bzImage
    append initrd=syslinux/kernel/initramfs.gz vga=1 nfsmount=10.0.0.1:/tftpboot/ploplinux-netboot nomodeset


label linuxfb-nfs
    menu label Plop Linux framebuffer mode - NFS
    kernel syslinux/kernel/bzImage
    append initrd=syslinux/kernel/initramfs.gz vga=0x317 nfsmount=10.0.0.1:/tftpboot/ploplinux-netboot
nfs.conf is loaded by /tftpboot/ploplinux-netboot/pxelinux.cfg/default
If the DHCP, Xinetd and NFS server are running correct you should be able to boot Plop Linux via network.
2.2. Boot ISO over NFS
You need the ISO ploplinux-26.2-x86_64.iso, the directory structure and files of ploplinux-pxeboot.tar.gz and the 'syslinux' directory of ploplinux-26.2-x86_64.tar.gz. The DHCP and TFTP Server must work.
Basic configs for your NFS server, without security aspects:
File name: /etc/exports
/tftpboot/ploplinux-netboot -no_subtree_check 10.0.0.250
File name: /etc/hosts.allow
portmap: 10.0.0.0/255.255.255.0
lockd: 10.0.0.0/255.255.255.0
rquotad: 10.0.0.0/255.255.255.0
mountd: 10.0.0.0/255.255.255.0
statd: 10.0.0.0/255.255.255.0
File name: /etc/hosts.deny
portmap:ALL
lockd:ALL
mountd:ALL
rquotad:ALL
statd:ALL
Copy ploplinux-26.2-x86_64.iso to '/tftpboot/ploplinux-netboot/'.
Create a symlink 'ln -s ploplinux-26.2-x86_64.iso ploplinux.iso'.
Parameter: nfsmount=NFSSHARE|ADDITIONALPARAMS iso_filename=ISOFILE
On the server: /tftpboot/ploplinux-netboot/ploplinux.iso
Example: nfsmount=10.0.0.1:/tftpboot/ploplinux-netboot iso_filename=ploplinux.iso
Example: nfsmount=10.0.0.1:/tftpboot/ploplinux-netboot|rsize=2048,wsize=2048,nolock,vers=2,hard,intr iso_filename=ploplinux.iso
File name: /tftpboot/ploplinux-netboot/pxelinux.cfg/nfs-iso.conf
# Boot from NFS - ISO

label linux-nfs-iso
    menu label Plop Linux - NFS ISO
    kernel syslinux/kernel/bzImage
    append initrd=syslinux/kernel/initramfs.gz vga=1 nfsmount=10.0.0.1:/tftpboot/ploplinux iso_filename=ploplinux.iso nomodeset


label linuxfb-nfs-iso
    menu label Plop Linux framebuffer mode - NFS ISO
    kernel syslinux/kernel/bzImage
    append initrd=syslinux/kernel/initramfs.gz vga=0x317 nfsmount=10.0.0.1:/tftpboot/ploplinux iso_filename=ploplinux.iso
nfs-iso.conf is loaded by /tftpboot/ploplinux-netboot/pxelinux.cfg/default
Remove the '#' in the line with '#include pxelinux.cfg/nfs-iso.conf' to enable the loading of
nfs-iso.conf.
3. Samba network share
3.1. Boot with Samba network share
Requirements are the DHCP and TFTP Server (Setup).
Basic configs for your Samba server, without security aspects:
Create the share 'ploplinux-netboot'.
File name: /etc/samba/smb.conf
;=== CUT =====

[ploplinux-netboot]
  path = /tftpboot/ploplinux-netboot
  writable = no
  read only = no


;=== CUT =====
Parameter: smbmount=//SERVER/SHARE:SMBUSER:SMBPASSWORD
SMBUSER: user to access the share. If the share permits access to all users then use "" for SMBUSER
SMBPASSWORD: password of the user to access the share. For an empty password use ""
Example: smbmount=//10.0.0.1/ploplinux-netboot:myuser:mypass
Example: smbmount=//10.0.0.1/ploplinux-netboot:myuser2:""
# Boot from Samba/Windows share

label linux-smb
menu label Plop Linux - Samba
    kernel syslinux/kernel/bzImage
    append initrd=syslinux/kernel/initramfs.gz vga=1 smbmount=//10.0.0.1/ploplinux-netboot:SMBUSER:SMBPASSWORD nomodeset


label linuxfb-smb
menu label Plop Linux framebuffer mode - Samba
    kernel syslinux/kernel/bzImage
    append initrd=syslinux/kernel/initramfs.gz vga=0x317 smbmount=//10.0.0.1/ploplinux-netboot:SMBUSER:SMBPASSWORD
smb.conf is loaded by /tftpboot/ploplinux-netboot/pxelinux.cfg/default
Remove the '#' in the line with '#include pxelinux.cfg/smb.conf' to enable the loading of
smb.conf.
When the DHCP, Xinetd and Samba server are running correct you should be able to boot Plop Linux via network.
3.2. Boot ISO over Samba
You need the ISO ploplinux-26.2-x86_64.iso, the directory structure and files of ploplinux-pxeboot.tar.gz and the 'syslinux' directory of ploplinux-26.2-x86_64.tar.gz. The DHCP and TFTP Server must work.
Basic configs for your Samba server, without security aspects:
Create the share 'ploplinux-netboot'.
File name: /etc/samba/smb.conf
;=== CUT =====

[ploplinux-netboot]
  path = /tftpboot/ploplinux-netboot
  writable = no
  read only = no


;=== CUT =====
Copy ploplinux-26.2-x86_64.iso to '/tftpboot/ploplinux-netboot/'.
Create there a symlink 'ln -s ploplinux-26.2-x86_64.iso ploplinux.iso'.
Parameter: smbmount=//SERVER/SHARE:SMBUSER:SMBPASSWORD iso_filename=ISOFILE
SMBUSER: user to access the share. If the share permits access to all users then use "" for SMBUSER
SMBPASSWORD: password of the user to access the share. For an empty password use ""
ISOFILE: ploplinux.iso (relative to the share)
On the server: /tftpboot/ploplinux-netboot/ploplinux.iso
Example: smbmount=//10.0.0.1/ploplinux-netboot:myuser:mypass iso_filename=ploplinux.iso
Example: smbmount=//10.0.0.1/ploplinux-netboot:myuser2:"" iso_filename=ploplinux.iso
File name: /tftpboot/ploplinux-netboot/pxelinux.cfg/smb-iso.conf
# Boot from Samba/Windows share - ISO

label linux-smb-iso
menu label Plop Linux - Samba ISO
    kernel syslinux/kernel/bzImage
    append initrd=syslinux/kernel/initramfs.gz vga=1 smbmount=//10.0.0.1/ploplinux-netboot:SMBUSER:SMBPASSWORD iso_filename=ploplinux.iso nomodeset


label linuxfb-smb-iso
menu label Plop Linux framebuffer mode - Samba ISO
    kernel syslinux/kernel/bzImage
    append initrd=syslinux/kernel/initramfs.gz vga=0x317 smbmount=//10.0.0.1/ploplinux-netboot:SMBUSER:SMBPASSWORD iso_filename=ploplinux.iso
smb-iso.conf is loaded by /tftpboot/ploplinux-netboot/pxelinux.cfg/default
Remove the '#' in the line with '#include pxelinux.cfg/smb-iso.conf' to enable the loading of
smb-iso.conf.
4. TFTP
4.1. Boot only with TFTP
Requirements are the DHCP and TFTP Server (Setup).
Create the file '/tftpboot/ploplinux-netboot/tftpfilelist' for TFTP boot that lists all Plop Linux files.
cd /tftpboot
find ploplinux-netboot > ploplinux-netboot/tftpfilelist
Example file: /tftpboot/ploplinux-netboot/tftpfilelist
Parameter: tftpboot=SERVER|FILELIST dir=PLOPLINUXDIRECTORY
Example: tftpboot=10.0.0.1|ploplinux-netboot/tftpfilelist dir=/ploplinux-netboot/ploplinux
File name: /tftpboot/ploplinux-netboot/pxelinux.cfg/tftp.conf
# boot from TFTP

label linux-tftp
menu label Plop Linux - TFTP
    kernel syslinux/kernel/bzImage
    append initrd=syslinux/kernel/initramfs.gz vga=1 tftpboot=10.0.0.1|ploplinux-netboot/tftpfilelist dir=/ploplinux-netboot/ploplinux nomodeset


label linuxfb-tftp
menu label Plop Linux framebuffer mode - TFTP
    kernel syslinux/kernel/bzImage
    append initrd=syslinux/kernel/initramfs.gz vga=0x317 tftpboot=10.0.0.1|ploplinux-netboot/tftpfilelist dir=/ploplinux-netboot/ploplinux
tftp.conf is loaded by /tftpboot/ploplinux-netboot/pxelinux.cfg/default
Remove the '#' in the line with '#include pxelinux.cfg/tftp.conf' to enable the loading of
tftp.conf.
Note: The default block size is 65464 bytes. You can use an smaller block size with the optional parameter BLOCK_SIZE.
Optional parameter BLOCK_SIZE: tftpboot=SERVER|FILELIST|BLOCK_SIZE dir=PLOPLINUXDIRECTORY
Example: tftpboot=10.0.0.1|ploplinux-netboot/tftpfilelist|32768 dir=/ploplinux-netboot/ploplinux
4.2. Boot ISO over TFTP
You need the ISO ploplinux-26.2-x86_64.iso, the directory structure and files of ploplinux-pxeboot.tar.gz and the 'syslinux' directory of ploplinux-26.2-x86_64.tar.gz. The DHCP and TFTP Server must work.
Create the file '/tftpboot/ploplinux-netboot/tftpfilelist-iso' for TFTP boot with the Plop Linux ISO file name.
cd /tftpboot/ploplinux-netboot
echo ploplinux-netboot/ploplinux.iso > tftpfilelist-iso
Copy ploplinux-26.2-x86_64.iso to '/tftpboot/ploplinux-netboot/'.
Create a symlink 'ln -s ploplinux-26.2-x86_64.iso ploplinux.iso'.
Parameter: tftpboot=SERVER|FILELIST iso_filename=ISOFILE
Example: tftpboot=10.0.0.1|ploplinux-netboot/tftpfilelist-iso iso_filename=ploplinux-netboot/ploplinux.iso
File name: /tftpboot/ploplinux-netboot/pxelinux.cfg/tftp-iso.conf
# boot from TFTP - ISO

label linux-tftp-iso
menu label Plop Linux - TFTP ISO
    kernel syslinux/kernel/bzImage
    append initrd=syslinux/kernel/initramfs.gz vga=1 tftpboot=10.0.0.1|ploplinux-netboot/tftpfilelist-iso iso_filename=ploplinux-netboot/ploplinux.iso nomodeset


label linuxfb-tftp-iso
menu label Plop Linux framebuffer mode - TFTP ISO
    kernel syslinux/kernel/bzImage
    append initrd=syslinux/kernel/initramfs.gz vga=0x317 tftpboot=10.0.0.1|ploplinux-netboot/tftpfilelist-iso iso_filename=ploplinux-netboot/ploplinux.iso
tftp-iso.conf is loaded by /tftpboot/ploplinux-netboot/pxelinux.cfg/default
Remove the '#' in the line with '#include pxelinux.cfg/tftp-iso.conf' to enable the loading of
tftp-iso.conf.
Note: The default block size is 65464 bytes. You can use an smaller block size with the optional parameter BLOCK_SIZE.
Optional parameter BLOCK_SIZE: tftpboot=SERVER|FILELIST|BLOCK_SIZE iso_filename=ISOFILE
Example: tftpboot=10.0.0.1|ploplinux-netboot/tftpfilelist-iso|32768 iso_filename=ploplinux-netboot/ploplinux.iso
5. FTP
5.1. Boot with FTP
Requirements are the DHCP and TFTP Server (Setup) and a FTP Server.
The FTP root directory is in this example '/tftpboot/'.
Create the file '/tftpboot/ploplinux-netboot/filelist' for FTP boot that lists all Plop Linux files.
cd /tftpboot/ploplinux-netboot
find > ftpfilelist
Example file: /tftpboot/ploplinux-netboot/ftpfilelist
Parameter: url=ftp://FTPUSER:FTPPASSWORD@FTPSERVER/FTPDIRECTORY|FILELIST
Example: url=ftp://myuser:mypass@10.0.0.1/ploplinux-netboot|/ftpfilelist
File name: /tftpboot/ploplinux-netboot/pxelinux.cfg/ftp.conf
# boot from FTP

label linux-ftp
menu label Plop Linux - FTP
    kernel syslinux/kernel/bzImage
    append initrd=syslinux/kernel/initramfs.gz vga=1 url=ftp://myuser:mypass@10.0.0.1/ploplinux-netboot|/ftpfilelist nomodeset


label linuxfb-ftp
menu label Plop Linux framebuffer mode - FTP
    kernel syslinux/kernel/bzImage
    append initrd=syslinux/kernel/initramfs.gz vga=0x317 url=ftp://myuser:mypass@10.0.0.1/ploplinux-netboot|/ftpfilelist
ftp.conf is loaded by /tftpboot/ploplinux-netboot/pxelinux.cfg/default
Remove the '#' in the line with '#include pxelinux.cfg/ftp.conf' to enable the loading of
ftp.conf.
5.2. Boot ISO over FTP
You need the ISO ploplinux-26.2-x86_64.iso, the directory structure and files of ploplinux-pxeboot.tar.gz and the 'syslinux' directory of ploplinux-26.2-x86_64.tar.gz. The DHCP and TFTP Server must work. A FTP Server must be available.
The FTP root directory is in this example '/tftpboot/'.
Create the file '/tftpboot/ploplinux-netboot/ftpfilelist-iso' for FTP boot with the Plop Linux ISO file name.
cd /tftpboot/ploplinux-netboot
echo ploplinux.iso > ftpfilelist-iso
Copy ploplinux-26.2-x86_64.iso to '/tftpboot/ploplinux-netboot/'.
Create a symlink 'ln -s ploplinux-26.2-x86_64.iso ploplinux.iso'.
Parameter: url=ftp://FTPUSER:FTPPASSWORD@FTPSERVER/FTPDIRECTORY|FILELIST iso_filename=ISOFILE
Example: url=ftp://myuser:mypass@10.0.0.1/ploplinux-netboot|/ftpfilelist-iso iso_filename=ploplinux.iso
File name: /tftpboot/ploplinux-netboot/pxelinux.cfg/ftp-iso.conf
# boot from FTP - ISO

label linux-ftp-iso
menu label Plop Linux - FTP ISO
    kernel syslinux/kernel/bzImage
    append initrd=syslinux/kernel/initramfs.gz vga=1 url=ftp://myuser:mypass@10.0.0.1/ploplinux-netboot|/ftpfilelist-iso iso_filename=ploplinux.iso nomodeset


label linuxfb-ftp-iso
menu label Plop Linux framebuffer mode - FTP ISO
    kernel syslinux/kernel/bzImage
    append initrd=syslinux/kernel/initramfs.gz vga=0x317 url=ftp://myuser:mypass@10.0.0.1/ploplinux-netboot|/ftpfilelist-iso iso_filename=ploplinux.iso
ftp-iso.conf is loaded by /tftpboot/ploplinux-netboot/pxelinux.cfg/default
Remove the '#' in the line with '#include pxelinux.cfg/ftp-iso.conf' to enable the loading of
ftp-iso.conf.
6. HTTP
6.1. Boot with HTTP
Requirements are the DHCP and TFTP Server (Setup) and a WEB Server.
The Virtual Host root directory is in this example '/tftpboot/'.
Create the file '/tftpboot/ploplinux-netboot/filelist' for HTTP boot that lists all Plop Linux files.
cd /tftpboot/ploplinux-netboot
find > webfilelist
Example file: /tftpboot/ploplinux-netboot/webfilelist
Parameter: url=http://USER:PASS@WEBSERVER/WEBDIRECTORY|FILELIST
Example: url=http://www.ploplinux.com/ploplinux-netboot|/webfilelist
Example: url=http://myuser:mypass@www.ploplinux.com/ploplinux-netboot|/webfilelist
File name: /tftpboot/ploplinux-netboot/pxelinux.cfg/http.conf
# boot from HTTP

label linux-http
menu label Plop Linux - HTTP
    kernel syslinux/kernel/bzImage
    append initrd=syslinux/kernel/initramfs.gz vga=1 url=http://www.ploplinux.com/ploplinux-netboot|/webfilelist nomodeset


label linuxfb-http
menu label Plop Linux framebuffer mode - HTTP
    kernel syslinux/kernel/bzImage
    append initrd=syslinux/kernel/initramfs.gz vga=0x317 url=http://www.ploplinux.com/ploplinux-netboot|/webfilelist
http.conf is loaded by /tftpboot/ploplinux-netboot/pxelinux.cfg/default
Remove the '#' in the line with '#include pxelinux.cfg/http.conf' to enable the loading of
http.conf.
6.2. Boot ISO over HTTP
You need the ISO ploplinux-26.2-x86_64.iso, the directory structure and files of ploplinux-pxeboot.tar.gz and the 'syslinux' directory of ploplinux-26.2-x86_64.tar.gz. The DHCP and TFTP Server must work. A WEB Server must be available.
The Virtual Host root directory is in this example '/tftpboot/'.
Create the file '/tftpboot/ploplinux-netboot/webfilelist-iso' for HTTP boot with the Plop Linux ISO file name.
cd /tftpboot/ploplinux-netboot
echo ploplinux.iso > webfilelist-iso
Copy ploplinux-26.2-x86_64.iso to '/tftpboot/ploplinux-netboot/'.
Create a symlink 'ln -s ploplinux-26.2-x86_64.iso ploplinux.iso'.
Parameter: url=http://USER:PASS@WEBSERVER/WEBDIRECTORY|FILELIST iso_filename=ISOFILE
Example: url=http://www.ploplinux.com/ploplinux-netboot|/webfilelist-iso iso_filename=ploplinux.iso
Example: url=http://myuser:mypass@www.ploplinux.com/ploplinux-netboot|/webfilelist-iso iso_filename=ploplinux.iso
File name: /tftpboot/ploplinux-netboot/pxelinux.cfg/http-iso.conf
# boot from HTTP - ISO

label linux-http-iso
menu label Plop Linux - HTTP ISO
    kernel syslinux/kernel/bzImage
    append initrd=syslinux/kernel/initramfs.gz vga=1 url=http://www.ploplinux.com/ploplinux-netboot|/webfilelist-iso iso_filename=ploplinux.iso nomodeset


label linuxfb-http-iso
menu label Plop Linux framebuffer mode - HTTP ISO
    kernel syslinux/kernel/bzImage
    append initrd=syslinux/kernel/initramfs.gz vga=0x317 url=http://www.ploplinux.com/ploplinux-netboot|/webfilelist-iso iso_filename=ploplinux.iso
http-iso.conf is loaded by /tftpboot/ploplinux-netboot/pxelinux.cfg/default
Remove the '#' in the line with '#include pxelinux.cfg/http-iso.conf' to enable the loading of
http-iso.conf.
7. Boot problems
Maybe there is somewhere a wrong path. When you are in the boot menu, then press at the entry that you want to boot the tabulator key. Then add at the end of the line 'debug'. You will see more info's during booting.
PXE Boot from network (DHCP, TFTP, Network share, FTP, HTTP) - Windows server
The minimum requirements to boot from network are a DHCP server and a TFTP server
The access to the Plop Linux files can be with a Windows network share, TFTP, FTP or HTTP
Download a working sample with the full directory structure: netboot-sample.tar.gz, for ISO netboot-sample-iso.tar.gz
The download links in this description are for the 64-bit version. To create a 32-bit version use the corresponding files from the download area.
Basic conditions for this example setup:
- Network type: 10.0.0.x Netmask 255.255.255.0
- Server IP: 10.0.0.1
- Client IP: received from the DHCP server
- TFTP root directory: c:\tftpboot
It works with other IP addresses too!
| 1. Setup |
| 1.1. Extract the Plop Linux files |
| 1.2. Setup the DHCP and TFTP server |
| 2. The network share |
| 2.1 Boot with Windows network share |
| 2.2 Boot the ISO over the Windows network share |
| 3. TFTP |
| 3.1 Boot with TFTP |
| 3.2 Boot the ISO over TFTP |
| 4. FTP |
| 4.1 Boot with FTP |
| 4.2 Boot the ISO over FTP |
| 5. HTTP |
| 5.1 Boot with HTTP |
| 5.2 Boot the ISO over HTTP |
| 6. Boot problems |
1. Setup
1.1. Extract the Plop Linux files
Extract the file ploplinux-pxeboot.zip to c:\
Now you have the basic directory structure and files in c:\tftpboot.
Extract the file ploplinux-26.2-x86_64.zip
Copy the content of the directory ploplinux-26.2\ to c:\tftpboot\ploplinux-netboot\.
Now you should have the following directories and files
c:\tftpboot\
           \ploplinux-netboot\
                    	     \boot.msg
                    	     \memtest
		    	     \menu.c32
		    	     \spash.png
		    	     \vesamenu.c32
                             \pxelinux.0
                    	     \ploplinux\
                            	       \bin\
                            	       \bin.sqfs
                            	       \etc.tgz
                            	       \lib.sqfs
			    	       \opt\
                            	       \ploplinux.version
                    		       \pxelinux.cfg\
                                		    \default
		    		       \syslinux\
		            			\kernel\
		                    		       \bzImage
			            		       \initramfs.gz
		            			\plop\
		                		     \plpbt.bin
			        		     \plpinstc.com
1.2. Setup the DHCP and TFTP server
Use TFTPD32 from http://tftpd32.jounin.net/. This is a DHCP and TFTP server in one program.
TFTPD32 settings:
- Set base directory to c:\tftpboot
- Enable TFTP server
- Enable DHCP server
- If needed TFTP security none
- Enable Option negotiation
- Enable Translate Unix file names
Setup DHCP:
- IP pool address starting with 10.0.0.100
- Boot file \ploplinux-netboot\pxelinux.0
2. Windows network share
2.1. Boot with Windows network share
Requirements are the DHPC and TFTP Server (Setup).
Share the directory c:\tftpboot\ploplinux-netboot with the share name ploplinux-netboot.
Parameter: smbmount=//SERVER/SHARE:SMBUSER:SMBPASSWORD
SMBUSER: user to access the share. If the share permits access to all users then use "" for SMBUSER
SMBPASSWORD: password of the user to access the share. For an empty password use ""
Example: smbmount=//10.0.0.1/ploplinux:myuser:mypass
Example: smbmount=//10.0.0.1/ploplinux:myuser2:""
File name: c:\tftpboot\ploplinux-netboot\pxelinux.cfg\smb.conf
# Boot from Samba/Windows share

label linux-smb
menu label Plop Linux - Samba
    kernel syslinux/kernel/bzImage
    append initrd=syslinux/kernel/initramfs.gz vga=1 smbmount=//10.0.0.1/ploplinux-netboot:SMBUSER:SMBPASSWORD nomodeset


label linuxfb-smb
menu label Plop Linux framebuffer mode - Samba
    kernel syslinux/kernel/bzImage
    append initrd=syslinux/kernel/initramfs.gz vga=0x317 smbmount=//10.0.0.1/ploplinux-netboot:SMBUSER:SMBPASSWORD
smb.conf is loaded by c:\tftpboot\ploplinux-netboot\pxelinux.cfg\default
Remove the # in the line with #include pxelinux.cfg/smb.conf to enable the loading of
smb.conf.
If the tftpd32 is running correct you should be able to boot Plop Linux via network.
2.2. Boot ISO over the Windows network share
You need the ISO ploplinux-26.2-x86_64.iso, the directory structure and files of ploplinux-pxeboot.zip and the syslinux directory of ploplinux-26.2-x86_64.zip. The DHCP and TFTP Server must work.
Requirements are the DHPC and TFTP Server (Setup).
Share the directory c:\tftpboot\ploplinux-netboot with the share name ploplinux-netboot
Copy ploplinux-26.2-x86_64.iso to c:\tftpboot\ploplinux-netboot\
Rename it to ploplinux.iso
Parameter smbmount=//SERVER/SHARE:SMBUSER:SMBPASSWORD iso_filename=ISOFILE
SMBUSER: user to access the share. If the share permits access to all users then use "" for SMBUSER
SMBPASSWORD: password of the user to access the share. For an empty password use ""
iso_filename=: ISO name relative to the share
Example: smbmount=//10.0.0.1/ploplinux-netboot:myuser:mypass iso_filename=ploplinux.iso
Example: smbmount=//10.0.0.1/ploplinux-netboot:myuser:"" iso_filename=ploplinux.iso
File name: c:\tftpboot\ploplinux-netboot\pxelinux.cfg\smb-iso.conf
# Boot from Samba/Windows share - ISO

label linux-smb-iso
menu label Plop Linux - Samba ISO
    kernel syslinux/kernel/bzImage
    append initrd=syslinux/kernel/initramfs.gz vga=1 smbmount=//10.0.0.1/ploplinux-netboot:SMBUSER:SMBPASSWORD iso_filename=ploplinux.iso nomodeset


label linuxfb-smb-iso
menu label Plop Linux framebuffer mode - Samba ISO
    kernel syslinux/kernel/bzImage
    append initrd=syslinux/kernel/initramfs.gz vga=0x317 smbmount=//10.0.0.1/ploplinux-netboot:SMBUSER:SMBPASSWORD iso_filename=ploplinux.iso
smb-iso.conf is loaded by c:\tftpboot\ploplinux-netboot\pxelinux.cfg\default
Remove the # in the line with #include pxelinux.cfg/smb-iso.conf to enable the loading of
smb-iso.conf.
3. TFTP
3.1. Boot only with TFTP
Requirements are the DHPC and TFTP Server (Setup).
Create the file c:\tftpboot\ploplinux-netboot\filelist for TFTP boot that lists all Plop Linux files. You can use the program genfilelist.exe from the command line.
genfilelist c:\tftpboot ploplinux-netboot > c:\tftpboot\ploplinux-netboot\tftpfilelist
Example file: c:\tftpboot\ploplinux-netboot\tftpfilelist
Parameter: tftpboot=SERVER|FILELIST dir=PLOPLINUXDIRECTORY
Example: tftpboot=10.0.0.1|ploplinux-netboot/tftpfilelist dir=/ploplinux-netboot/ploplinux
File name: c:\tftpboot\ploplinux-netboot\pxelinux.cfg\tftp.conf
# boot from TFTP

label linux-tftp
menu label Plop Linux - TFTP
    kernel syslinux/kernel/bzImage
    append initrd=syslinux/kernel/initramfs.gz vga=1 tftpboot=10.0.0.1|ploplinux-netboot/tftpfilelist dir=/ploplinux-netboot/ploplinux nomodeset


label linuxfb-tftp
menu label Plop Linux framebuffer mode - TFTP
    kernel syslinux/kernel/bzImage
    append initrd=syslinux/kernel/initramfs.gz vga=0x317 tftpboot=10.0.0.1|ploplinux-netboot/tftpfilelist dir=/ploplinux-netboot/ploplinux
tftp.conf is loaded by c:\tftpboot\ploplinux-netboot\pxelinux.cfg\default
Remove the # in the line with #include pxelinux.cfg/tftp.conf to enable the loading of
tftp.conf.
Note: The default block size is 65464 bytes. You can use an smaller block size with the optional parameter BLOCK_SIZE.
Optional parameter BLOCK_SIZE: tftpboot=SERVER|FILELIST|BLOCK_SIZE dir=PLOPLINUXDIRECTORY
Example: tftpboot=10.0.0.1|ploplinux-netboot/tftpfilelist|32768 dir=/ploplinux-netboot/ploplinux
3.2. Boot ISO over TFTP
You need the ISO ploplinux-26.2-x86_64.iso, the directory structure and files of ploplinux-pxeboot.zip and the syslinux directory of ploplinux-26.2-x86_64.zip. The DHCP and TFTP Server must work.
Copy ploplinux-26.2-x86_64.iso to c:\tftpboot\ploplinux-netboot\
Rename it to ploplinux.iso
Create the file c:\tftpboot\ploplinux-netboot\tftpfilelist-iso for TFTP boot with the Plop Linux ISO file name. In the file the path has to use "/" instead of "\".
echo "ploplinux-netboot/ploplinux.iso" > c:\tftpboot\ploplinux-netboot\tftpfilelist-iso
Parameter: tftpboot=SERVER|FILELIST iso_filename=ISOFILE
Example: tftpboot=10.0.0.1|ploplinux-netboot/tftpfilelist-iso iso_filename=ploplinux-netboot/ploplinux.iso
File name: c:\tftpboot\ploplinux-netboot\pxelinux.cfg\tftp-iso.conf
# boot from TFTP - ISO

label linux-tftp-iso
menu label Plop Linux - TFTP ISO
    kernel syslinux/kernel/bzImage
    append initrd=syslinux/kernel/initramfs.gz vga=1 tftpboot=10.0.0.1|ploplinux-netboot/tftpfilelist-iso iso_filename=ploplinux-netboot/ploplinux.iso nomodeset


label linuxfb-tftp-iso
menu label Plop Linux framebuffer mode - TFTP ISO
    kernel syslinux/kernel/bzImage
    append initrd=syslinux/kernel/initramfs.gz vga=0x317 tftpboot=10.0.0.1|ploplinux-netboot/tftpfilelist-iso iso_filename=ploplinux-netboot/ploplinux.iso
tftp-iso.conf is loaded by c:\tftpboot\ploplinux-netboot\pxelinux.cfg\default
Remove the # in the line with #include pxelinux.cfg/tftp-iso.conf to enable the loading of
tftp-iso.conf.
Note: The default block size is 65464 bytes. You can use an smaller block size with the optional parameter BLOCK_SIZE.
Optional parameter BLOCK_SIZE: tftpboot=SERVER|FILELIST|BLOCK_SIZE iso_filename=ISOFILE
Example: tftpboot=10.0.0.1|ploplinux-netboot/tftpfilelist-iso|32768 iso_filename=ploplinux-netboot/ploplinux.iso
4. FTP
4.1. Boot with FTP
Requirements are the DHPC and TFTP Server (Setup) and a FTP Server.
The FTP root directory is in this example /tftpboot/.
Create the file c:\tftpboot\ploplinux-netboot\filelist for FTP boot that lists all Plop Linux files. You can use the program genfilelist.exe from the command line.
genfilelist c:\tftpboot\ploplinux-netboot ploplinux > c:\tftpboot\ploplinux-netboot\ftpfilelist
Example file: c:\tftpboot\ploplinux-netboot\ftpfilelist
Parameter: url=ftp://FTPUSER:FTPPASSWORD@FTPSERVER/FTPDIRECTORY|FILELIST
Example: url=ftp://myuser:mypass@10.0.0.1/ploplinux-netboot|/ftpfilelist
File name: c:\tftpboot\ploplinux-netboot\pxelinux.cfg\ftp.conf
# boot from FTP

label linux-ftp
menu label Plop Linux - FTP
    kernel syslinux/kernel/bzImage
    append initrd=syslinux/kernel/initramfs.gz vga=1 url=ftp://myuser:mypass@10.0.0.1/ploplinux-netboot|/ftpfilelist nomodeset


label linuxfb-ftp
menu label Plop Linux framebuffer mode - FTP
    kernel syslinux/kernel/bzImage
    append initrd=syslinux/kernel/initramfs.gz vga=0x317 url=ftp://myuser:mypass@10.0.0.1/ploplinux-netboot|/ftpfilelist
ftp.conf is loaded by c:\tftpboot\ploplinux-netboot\pxelinux.cfg\default
Remove the # in the line with #include pxelinux.cfg/ftp.conf to enable the loading of
ftp.conf.
4.2. Boot ISO over FTP
You need the ISO ploplinux-26.2-x86_64.iso, the directory structure and files of ploplinux-pxeboot.zip and the syslinux directory of ploplinux-26.2-x86_64.zip. The DHCP and TFTP Server must work. A FTP Server must be available.
The FTP root directory is in this example /tftpboot/.
Copy ploplinux-26.2-x86_64.iso to c:\tftpboot\ploplinux-netboot\
Rename it to ploplinux.iso
Create the file c:\tftpboot\ploplinux-netboot\ftpfilelist-iso for FTP boot with the Plop Linux ISO file name. In the file the path has to use "/" instead of "\".
echo "ploplinux.iso" > c:\tftpboot\ploplinux-netboot\ftpfilelist-iso
Parameter: url=ftp://FTPUSER:FTPPASSWORD@FTPSERVER/FTPDIRECTORY|FILELIST iso_filename=ISOFILE
Example: url=ftp://myuser:mypass@10.0.0.1/ploplinux-netboot|/ftpfilelist-iso iso_filename=ploplinux.iso
File name: c:\tftpboot\ploplinux-netboot\pxelinux.cfg\ftp-iso.conf
# boot from FTP - ISO

label linux-ftp-iso
menu label Plop Linux - FTP ISO
    kernel syslinux/kernel/bzImage
    append initrd=syslinux/kernel/initramfs.gz vga=1 url=ftp://myuser:mypass@10.0.0.1/ploplinux-netboot|/ftpfilelist-iso iso_filename=ploplinux.iso nomodeset


label linuxfb-ftp-iso
menu label Plop Linux framebuffer mode - FTP ISO
    kernel syslinux/kernel/bzImage
    append initrd=syslinux/kernel/initramfs.gz vga=0x317 url=ftp://myuser:mypass@10.0.0.1/ploplinux-netboot|/ftpfilelist-iso iso_filename=ploplinux.iso
ftp-iso.conf is loaded by c:\tftpboot\ploplinux-netboot\pxelinux.cfg\default
Remove the # in the line with #include pxelinux.cfg/ftp-iso.conf to enable the loading of
ftp-iso.conf.
5. HTTP
5.1. Boot with HTTP
Requirements are the DHPC and TFTP Server (Setup) and a WEB Server.
The Virtual Host root directory is in this example /tftpboot/.
Create the file c:\tftpboot\ploplinux-netboot\filelist for HTTP boot that lists all Plop Linux files. You can use the program genfilelist.exe from the command line.
genfilelist c:\tftpboot\ploplinux-netboot ploplinux > c:\tftpboot\ploplinux-netboot\webfilelist
Example file: c:\tftpboot\ploplinux-netboot\webfilelist
Parameter: url=http://USER:PASS@WEBSERVER/WEBDIRECTORY|FILELIST
Example: url=http://www.ploplinux.com/ploplinux-netboot|/webfilelist
Example: url=http://myuser:mypass@www.ploplinux.com/ploplinux-netboot|/webfilelist
File name: c:\tftpboot\ploplinux-netboot\pxelinux.cfg\http.conf
# boot from HTTP

label linux-http
menu label Plop Linux - HTTP
    kernel syslinux/kernel/bzImage
    append initrd=syslinux/kernel/initramfs.gz vga=1 url=http://www.ploplinux.com/ploplinux-netboot|/webfilelist nomodeset


label linuxfb-http
menu label Plop Linux framebuffer mode - HTTP
    kernel syslinux/kernel/bzImage
    append initrd=syslinux/kernel/initramfs.gz vga=0x317 url=http://www.ploplinux.com/ploplinux-netboot|/webfilelist
http.conf is loaded by c:\tftpboot\ploplinux-netboot\pxelinux.cfg\default
Remove the # in the line with #include pxelinux.cfg/http.conf to enable the loading of
http.conf.
5.2. Boot ISO over HTTP
You need the ISO ploplinux-26.2-x86_64.iso, the directory structure and files of ploplinux-pxeboot.zip and the syslinux directory of ploplinux-26.2-x86_64.zip. The DHCP and TFTP Server must work. A WEB Server must be available.
The Virtual Host root directory is in this example c:\tftpboot\.
Copy ploplinux-26.2-x86_64.iso to c:\tftpboot\ploplinux-netboot\
Rename it to ploplinux.iso
Create the file c:\tftpboot\ploplinux-netboot\webfilelist-iso for HTTP boot with the Plop Linux ISO file name. In the file the path has to use "/" instead of "\".
echo "ploplinux.iso" > c:\tftpboot\ploplinux-netboot\webfilelist-iso
Parameter: url=http://USER:PASS@WEBSERVER/WEBDIRECTORY|FILELIST iso_filename=ISOFILE
Example: url=http://www.ploplinux.com/ploplinux-netboot|/webfilelist-iso iso_filename=ploplinux.iso
Example: url=http://myuser:mypass@www.ploplinux.com/ploplinux-netboot|/webfilelist-iso iso_filename=ploplinux.iso
File name: c:\tftpboot\ploplinux-netboot\pxelinux.cfg\http-iso.conf
# boot from HTTP - ISO

label linux-http-iso
menu label Plop Linux - HTTP ISO
    kernel syslinux/kernel/bzImage
    append initrd=syslinux/kernel/initramfs.gz vga=1 url=http://www.ploplinux.com/ploplinux-netboot|/webfilelist-iso iso_filename=ploplinux.iso nomodeset


label linuxfb-http-iso
menu label Plop Linux framebuffer mode - HTTP ISO
    kernel syslinux/kernel/bzImage
    append initrd=syslinux/kernel/initramfs.gz vga=0x317 url=http://www.ploplinux.com/ploplinux-netboot|/webfilelist-iso iso_filename=ploplinux.iso
http-iso.conf is loaded by c:\tftpboot\ploplinux-netboot\pxelinux.cfg\default
Remove the # in the line with #include pxelinux.cfg/http-iso.conf to enable the loading of
http-iso.conf.
6. Boot problems
Maybe there is somewhere a wrong path. When you are in the boot menu, then press at the entry that you want to boot the tabulator key. Then add at the end of the line "debug". You will see more info's during booting.
Reduce size
The file opt.sqfs contains Xorg, Xfce, Fluxbox and all GUI programs. When you don't need them, then just remove the opt.sqfs file. It's optional and not required to boot.
It's also possible to build a custom Live version and strip binaries, remove programs and so on. You find more details in the Build Live Release article of the Build Tools section. 4.2. Reduced size describes how to build a smaller Live Version of Plop Linux.
A smaller version of Plop Linux (i486) is available as download.
Add LibreOffice or OpenOffice
You can add LibreOffice and/or OpenOffice to the Plop Linux Live version with a script. The office files will be added to the opt.sqfs file. Find more details about custom opt.sqfs on the Build Live Release in the Build Tools section.
LibreOffice
• Download the script office_live.sh
Make the script executable: chmod 700 office_live.sh
Script parameters: You set the operation mode with first parameter of this script. For LibreOffice it is -L. The second parameter is the office archive.
• Download LibreOffice from the offical homepage.
Example file name: LibreOffice_25.2.2.2_Linux_x86-64_rpm.tar.gz
• Copy the file opt.sqfs of your Plop Linux to the same directory where you downloaded the script and LibreOffice.
• Run ./office_live.sh -L LibreOffice_25.2.2.2_Linux_x86-64_rpm.tar.gz to create the file opt_new.sqfs
• Replace the opt.sqfs file of your Live Plop Linux with the newly created opt_new.sqfs file.
• Done.
OpenOffice
• Download the script office_live.sh
Make the script executable: chmod 700 office_live.sh
Script parameters: You set the operation mode with first parameter of this script. For OpenOffice it is -O. The second parameter is the office archive.
• Download OpenOffice from the offical homepage.
Example file name: Apache_OpenOffice_4.1.2_Linux_x86-64_install-rpm_en-US.tar.gz
• Copy the file opt.sqfs of your Plop Linux to the same directory where you downloaded the script and OpenOffice.
• Run ./office_live.sh -O Apache_OpenOffice_4.1.2_Linux_x86-64_install-rpm_en-US.tar.gz to create the file opt_new.sqfs
• Replace the opt.sqfs file of your Live Plop Linux with the newly created opt_new.sqfs file.
• Done.
Backup / restore with Partimage
This example shows you how to backup/restore a NTFS partition. The backup file will be saved on a NTFS formatted USB hard disk.
Basic conditions:
- Windows is installed on the first partition of a SATA hard disk. This partition is formatted with NTFS.
- The partition image should be stored on a NTFS formatted USB hard disk.
- Device node SATA hard disk: /dev/sda
- Device node USB hard disk: /dev/sdb
Preparations:
-
Boot with Plop Linux.
-
Mount the USB hard disk.
mount /dev/sdb1 /mnt -t ntfs-3g -
Change to the USB hard disk.
cd /mnt
With the following instructions, you are able to create/restore partitions
| 1. Create a Partimage image |
| 1.1. Batch mode |
| 1.2. User interface |
| 2. Restore a partition |
| 2.1. Batch mode |
| 2.2. User interface |
1. Create a Partimage image
1.1. Batch mode
Create an image with the file name windowsXP_20070425 from
the partition /dev/sda1.
partimage -z1 -b -d save /dev/sda1 windowsXP_20070425
1.2. User interface
-
Start Partimage.
partimage -
Select the partition you want to backup.
/dev/sda1 -
Change with tabulator into the next field.
Enter a filename. ex.
windowsXP_20070425 -
Change with F5 to the next screen.
You can select some options. gzip compression is good and fast.
-
Change with F5 to the next screen.
You can enter a description for the image.
-
Change with 2x enter to the next screen.
-
You can see an overview about the partition. NTFS is experimental supported, but till now I never had problems. If Partimage has troubles with the partition, then the backup process will be aborted.
2. Restore a partition
2.1. Batch mode
Restore the partition /dev/sda1 from the file
windowsXP_20070425.000.
partimage -b restore /dev/sda1 windowsXP_20070425.000
2.2. User interface
-
Start Partimage.
partimage -
Select the partition you want to restore.
/dev/sda1 -
Change with Tabulator into the next field.
Enter the image filename. ex.
windowsXP_20070425.000 -
Change with F5 to the next screen.
If you are sure then answer the question with OK.
Now your partition will be restored.
Backup / restore with fsarchiver
This is only an example for a partition with Windows, but fsarchiver can work with Linux and other partitions too.
You have to use '-x' for NTFS to enable the experimental mode.
Backup: fsarchiver -x savefs windows.fsa /dev/sda1
Restore: fsarchiver restfs windows.fsa id=0,dest=/dev/sda1
NAS Server (FTP, NFS, Samba, SSHFS), Print Server, Wake On LAN
| Introduction |
| Add the NAS user |
| Mount the hard disk and test FTP access |
| NFS |
| Samba |
| SSHFS |
| Printer Server - cupsd |
| Wake on LAN |
| Restore all settings at bootup |
| Final words |
Introduction
This example shows how to setup a NAS Server (Network Attached Storage Server) and a few other Servers with the Plop Linux Live version. You can run it from CD/USB or from the Network.
For a NAS Server is the Plop Linux Desktop better than the Live Version, but this example should show you that everything is possible with the Live Version.
Add the NAS user
Run "adduser nas".
Mount the hard disk and test FTP access
Example: mounting a FAT partition with nas user rw access.
mount /dev/sda1 /home/nas -o uid=$(id -u nas)
Example: mounting an Ext2/3/4 partition.
mount /dev/sda2 /home/nas
You can test the write access when you run
ftp localhost
Login as user nas. Create a directory with "mkdir nastest". Do a "ls" to list the files.
To modify the FTP Server settings, edit the file /etc/proftpd.conf
NFS
Edit the file /etc/exports. Change /mnt to /home/nas. You can also set the some security here.
For quick localhost test allow access from 127.0.0.1:
/home/nas 192.168.0.* 10.0.0.* 127.0.0.1(rw)
Reload the changes with exportfs -ra. You will see some info's.
Stop NFS: killall -9 nfsd rpc.statd rpc.mountd portmap
Restart NFS: startnfs
Test mount (example your server has the IP 10.0.0.200): mount 10.0.0.200:/home/nas /mnt
Do a "ls /mnt" to see the files.
Do a "umount /mnt" to unmount.
For NFS details see the NFS homepage.
Samba
Add the Samba user with "smbpassword -a nas"
Test mount: mount //localhost/nas /mnt -o username=nas
Do a "ls /mnt" to see the files.
Do a "umount /mnt" to unmount.
Samba config file: /etc/samba/smb.conf
SSHFS
I suggest that you generate your own keys with "sshkeygen.sh". You have to do that only once. The keys will be restored (with "Restore all settings at bootup").
To enable the connection as root set a password with "passwd"
Test mount: sshfs localhost:/ /mnt
Do a "ls /mnt" to see the files.
Do a "umount /mnt" to unmount.
Allow other users to connect with SSH/SSHFS and other options see config file: /etc/ssh/sshd_config
Printer Server - cupsd
To use cupsd you need the opt.sqfs.
To configure CUPS from the text mode use "lynx localhost:631".
When you start Xfce or Fluxbox, then you can configure CUPS with a graphical browser.
When you configured CUPS to allow access from your LAN, then you can login from the LAN with any browser and the URL http://SERVERIP:631
CUPS config files: /etc/opt/cups
Wake on LAN
To enable WOL (Wake on LAN) for eth0 run setwol.
The script is: /media/ploplinux/bin/setwol
To wake up the computer you need the MAC address. You get it with "ifconfig eth0". Its the HWaddr (ex. 00:2a:c9:d8:a3:a1). Wake up form another PC (I suggest to write that in a file to execute it easily): wol 00:2a:c9:d8:a3:a1
Restore all settings at bootup
This is not the smartest, but fastest way to store and restore the settings. When you want a cleaner solution then store only the related files.
Stop NFS: killall -9 nfsd rpc.statd rpc.mountd portmap
Unmount the hard disk: umount /home/nas
Store the settings: tar cfz /nas.tar.gz /etc /home/nas
Copy nas.tar.gz to the ploplinux/opt directory.
Create the script ploplinux/bin/startnas
#!/bin/sh

echo Setup NAS Server

tar xfz $PLOPLINUX_DIR/opt/nas.tar.gz -C /

# mount the hard disk like described above
mount /dev/sda1 /home/nas

# restart nfs
killall -9 nfsd rpc.statd rpc.mountd portmap
exportfs -ra >& /dev/null
startnfs

# reload other daemon configs
killall -HUP sshd
killall -HUP proftpd
killall -HUP smbd
killall -HUP cupsd


# activate wol
setwol
Add at the end of ploplinux/bin/rc.local before "exit 0" the line "sh startnas".
When you boot the Live Plop Linux, then your NAS Server is ready.
Final words
You see, it's easy to setup a NAS Server with the Live version of Plop Linux. You can also add iptables rules to use it as router and firewall. Plop Linux is very powerful and you can do anything you want. When you want to remove the USB drive or CD, then use the copy2ram option as kernel parameter (the line with "append") in the syslinux/syslinux.cfg file.
You should also read Plop Linux Desktop.
Language settings
Example to setup german settings: setlanggerman.sh
#!/bin/sh

setfont lat0-16 -m 8859-1
loadkeys de-latin1

echo export LC_ALL=de_DE.UTF8 >> /etc/profile
echo export LANG=de_DE.UTF8 >> /etc/profile
echo export LANGUAGE=de_DE.UTF8 >> /etc/profile
Welcome text
Edit the file ploplinux/bin/welcome.txt to change the text.
Ext2/3 instead of FAT
If you want to use Ext2/3 on your USB drive then use extlinux instead of syslinux. The file syslinux.cfg must be renamed to extlinux.conf.
Splash screen
Replace the file syslinux/splash.png with your own image.
| Background image |  Zoom |
| Screenshot with menu |
Zoom |
You find detailed info's with commands and colors and so on at the syslinux menu.c32 page.
If you want a text mode menu then use menu.c32 instead of vesamenu.c32.
Special commands
| eth | - | quick setup ip address for eth0 |
| dhclient | - | get ip address from dhcp server |
| pciprobe | - | load device modules |
| ntfs mount | - | mount -t ntfs-3g devicename mountpoint |
Boot parameter
| copy2ram | - | copy the Linux files to the RAM |
| busybox | - | start Busybox |
| root= | - | required to force a boot device, ex. root=/dev/hda4 |
| vga= | - | set screen resolution / framebuffer |
| force_hd | - | do not scan cdrom drives |
| force_usb | - | do not scan ide hard disks |
| media_reverse_scan | - | scan drive from i to a |
| dir= | - | search Plop Linux in another directory than /ploplinux Example: dir=/test/ploplinux2 |
|
nfsmount= smbmount= tftpboot= url= | - | network boot |
| iso_filename | - | ISO file |
| debug | - | Debug output |
Wi-Fi (WLAN) - WPA
Connect to the Wi-Fi network
The command to create the WPA configuration file is
wpa_passphrase MYNETSSID MYPASS > /etc/wpa_supplicant.conf
Replace MYNETSSID with the SSID of the network to connect.
Replace MYPASS with the passphrase/key for the network.
Disable the LAN network card ifconfig eth0 down
Enable the Wi-Fi network card ifconfig wlan0 up
Start wpa_supplicant wpa_supplicant -Dwext -i wlan0 -c/etc/wpa_supplicant.conf
On another terminal setup the IP address. Example for DHCP: dhclient wlan0
When you get an error like Ioctl[SIOCSIWMODE]: Operation not supported then see the fix below.
Auto start Wi-Fi connect
Create the wpa_supplicant.conf file wpa_passphrase MYNETSSID MYPASS > wpa_supplicant.conf
Copy the wpa_supplicant.conf file to the ploplinux/opt/ directory.
Edit the file ploplinux/bin/rc.local
Above the line "exit 0" insert
# wlan
ifconfig eth0 down
ifconfig wlan0 up
wpa_supplicant -B -Dwext -i wlan0 -c/media/ploplinux/opt/wpa_supplicant.conf

dhclient wlan0
You can also create a custom etc.tgz file to have all needed configurations inside the etc.tgz file.
Error message: Ioctl[SIOCSIWMODE]: Operation not supported
When you get the error messages
Successfully initialized wpa_supplicant
Ioctl[SIOCSIWMODE]: Operation not supported
Ioctl[SIOCSIWRANGE]: Operation not supported
Ioctl[SIOCSIWMODE]: Operation not supported
Ioctl[SIOCSIWAP]: Operation not supported
Ioctl[SIOCSIWESSID]: Operation not supported
Ioctl[SIOCSIWENCODEEXT]: Operation not supported
Ioctl[SIOCSIWENCODE]: Operation not supported
Ioctl[SIOCSIWENCODEEXT]: Operation not supported
Ioctl[SIOCSIWENCODE]: Operation not supported
Ioctl[SIOCSIWSCAN]: Operation not supported
Then replace -Dwext with -Dnl80211.
The whole line became wpa_supplicant -B -Dnl80211 -i wlan0 -c/etc/wpa_supplicant.conf
See also here.
Support for blind / visually impaired users (brltty, Orca)
| Introduction |
| Startup |
| Mate Desktop |
| Keep own settings |
| Download |
Introduction
The BRL version has additional programs and is configured to help blind and visual impaired users.
Additional programs:
- brltty
- eSpeak
- speech-dispatcher
- Mate Desktop
- Orca
- Firefox
- LibreOffice
Additional configurations:
- 'startbrl' is started during booting
- Mate is the default desktop
- High Contrast theme
- Mate assistive technologies is enabled
- Mate show mouse position on control key is enabled
- LibreOffice accessibility is enabled
- Firefox is the default web browser
The ISO is a hybrid ISO. So you can put it quick and dirty on an USB drive with the 'dd' program, but all data on the drive will be overwritten. So be carefully. For USB drives its better to use the clean way with syslinux.
'rc.local' starts the script 'startbrl' during the boot process.
Currently, only the LiveCD is configured for BRL, but its easy to install all modifications to the Desktop Plop Linux. Contact me for more information.
Startup
At first comes the syslinux menu with various options. The default boot is Plop Linux in framebuffer mode. It starts automatically after 8 seconds. I know, its a delay, but when there are troubles with the framebuffer, then the second option is "text mode". Maybe its required to choose that option on a machine that makes troubles with the framebuffer.
Later you hear a welcome text and you will be asked if you want to start Mate. You have to press the enter key for yes or any other key for no. When you choose "no" then you are on tty1 as root in the home directory. brltty is already started. When you choose to start Mate, then comes a second question if you want to start Orca too. The enter key is yes, any other key is no.
Mate Desktop
In Mate, when you press ALT-F2, then you open the "Run application" window. When you press the cursor down key one time, then you fill it with the last command. It is set to "mate-terminal".
On current versions of Orca, you have to use 'orca -s' to enter the setup. I did not configure Orca. It starts with the default settings.
Keep own settings
When you configured Orca (and other stuff) and you want to automatically restore these settings when you boot, then you have to save the settings with the following command:
tar cfz /root.tar.gz /root
When you booted from a writeable drive (USB drive, network share, ...) then copy the file '/root.tar.gz' to the '/media/ploplinux/opt/' directory. The script 'setupcustomsettings' will extract this file during the boot and all your settings will be restored.
When you booted from a write protected drive (DVD and so on) then you have save the file '/root.tar.gz' to a writeable drive. Later you have to create for example a new ISO with the 'root.tar.gz' file in the 'ploplinux/opt/' directory.
Download
File size: 5.46 GB
32-Bit, i486: iso, tar.gz, zip
64-Bit, x86_64: iso, tar.gz, zip
Plop Linux Wallapers and Theme
4:3 1024x786


Slightly different, 16:9 1920x1080, 3840x2160

Theme
Configurations / FAQ - Frequently asked questions
I want to run my scripts at start of Plop Linux without login
I modified rc.local and now I got the error message ": command not found"
I do not see files with 'umlauten' on a device mounted with ntfs-3g
-
On what distribution is Plop Linux based on?
Plop Linux is built from scratch, there is no other distribution. See History.
-
I want to run my scripts at start of Plop Linux without login
The file ploplinux/bin/rc.local starts before login. Add your scripts in this file.
-
I modified rc.local and now I got the error message ": command not found"
Mostly rc.local was edited with an editor in Microsoft Windows. Use another editor (ex. vim), or convert rc.local in linux with the command dos2unix.
-
I want to use DHCP
Run dhclient to receive the IP from a DHCP server. You can add it to ploplinux/bin/rc.local.
-
How can I restart Samba
Use the following command: killall -9 smbd nmbd; smbd; nmbd
-
I want to use my own smb.conf and other config files
Create your config files and store it in ploplinux/bin. Let update your files with ploplinux/bin/rc.local at every Plop Linux start.
Example rc.local for Samba#!/bin/sh # modify this script as you wish, it will be executed after # the plop linux init. path is already set here (/media/ploplinux/bin) killall -9 smbd nmbd cp /media/ploplinux/bin/smb.conf /etc/samba/smb.conf smbd nmbd
-
What's the samba password
The samba root password is "ploplinux".
-
How-to change the samba password
Use smbpasswd to change the password.
-
I don't want to set my samba password every time again
Change your password in Plop Linux with smbpasswd. Copy /etc/samba/private/smbpasswd away form Plop Linux. Create a new ISO image with the saved smbpasswd file in ploplinux/bin/ and modify rc.local.
rc.local
#!/bin/sh
# modify this script as you wish, it will be executed after
# the plop linux init. path is already set here (/media/ploplinux/bin)

cp /media/ploplinux/opt/smbpasswd /etc/samba/private/smbpasswd
-
What's the ssh password
The ssh password is the same as the login password. The default root password is ploplinux.
To a new password run as root: passwd
-
I don't want to set my password every time again
Change your password in Plop Linux with passwd. Copy /etc/shadow away form Plop Linux. Create a new ISO image with the saved shadow file in ploplinux/opt/ and modify rc.local.
rc.local
#!/bin/sh
# modify this script as you wish, it will be executed after
# the plop linux init. path is already set here (/media/ploplinux/bin)

cp /media/ploplinux/opt/shadow /etc/shadow
-
I can't write to my NTFS Partition
In the most cases you forgot the mount parameter -t ntfs-3g.
Correct mount for a NTFS Partitions: mount -t ntfs-3g <device> <mountpoint>
-
ntfs-3g mount: Windows is hibernated. refused to mount
Writing to this partition is not allowed. Mount the partition with -t ntfs-3g -o ro. The partition will be mounted as read-only.
-
Change keyboard layout/map
Ex. german keyboard map
loadkeys de-latin1
You can add this to ploplinux/bin/rc.local
-
I do not see files with 'umlauten' on a device mounted with ntfs-3g
You have to add locale settings
mount -t ntfs-3g -o locale=de_DE.UTF-8 <device> <mountpoint>
-
I don't want auto login on terminal one
Remove the file ploplinux/bin/autologin
-
I want to use startx at startup
Uncomment in rc.local autostartx.
-
How to disable monitor turn off
For the console use setterm -blank 0 add it to the rc.local.
For the X-Server (with gnome and fluxbox) use xset -dpms s off add it to the top of /root/.xinitrc
-
How to disable kernel messages
To disable the bootup kernel messages add to the append line in the isolinux.cfg (and similar) the parameter quiet
To disable the kernel messages on the console use setterm -msg off add it to the rc.local
-
How to install the flash player
Download the latest Adobe Flash Player from Adobe. Choose the tar.gz version. Extract the file and copy libflashplayer.so to the Plop Linux directory
ploplinux/opt/. -
How to install office
See here.
-
Are there more information about configurations
Yes, in the desktop area configurations
© 2026 by
Elmar Hanlhofer
This page was last modified on 07/Apr/2026.