| English / Deutsch | Print version |
Plop Linux - ARM CPU Version
Table of Contents
Introduction
Plop Linux is a distribution built from scratch. It's designed for advanced Linux users. See also Desktop and Server section.
Current stable: 26.2 for i486 (32-bit), x86_64 (64-bit) and ARM CPU armv6l
System requirements
System requirements for the ARM version:
- ARM armv6l compatible processor
- 64 MB RAM
- 10 GB partition
Screenshots
Console zoom |
Console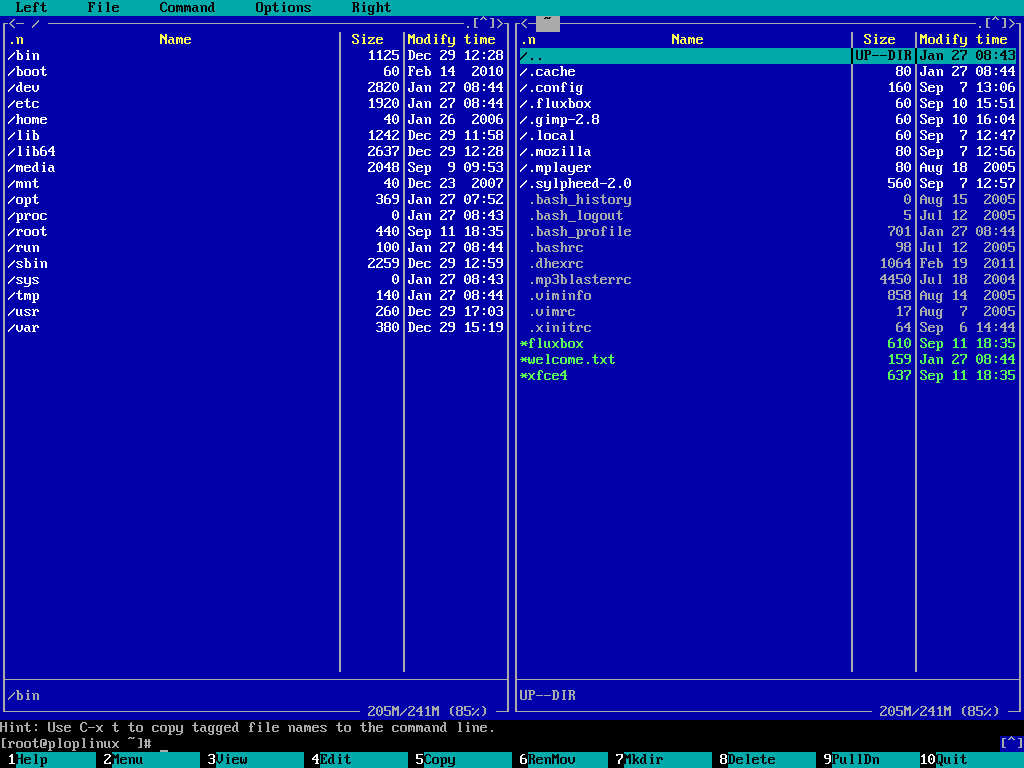 zoom |
Fluxbox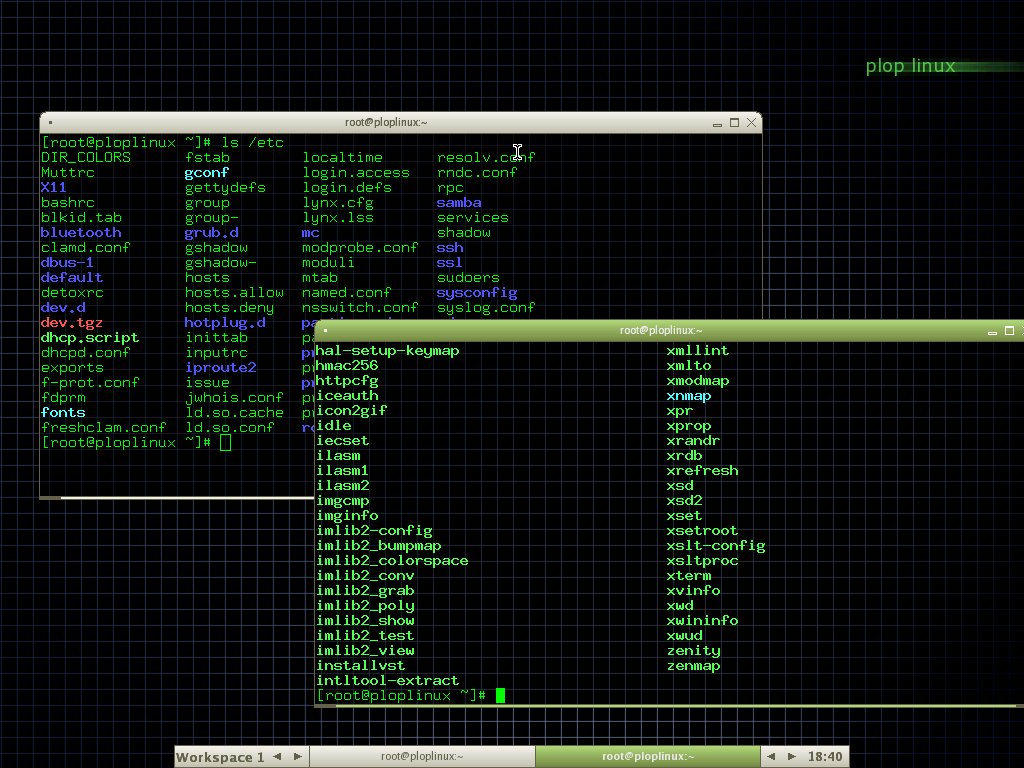 zoom |
||
Xfce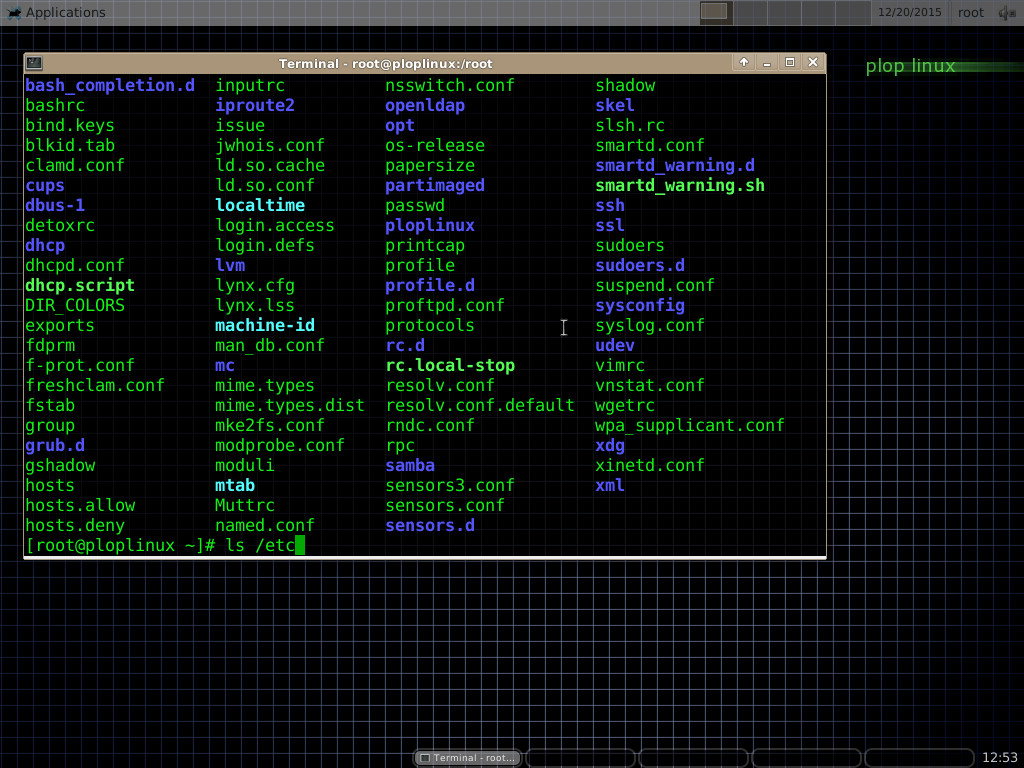 zoom |
Xfce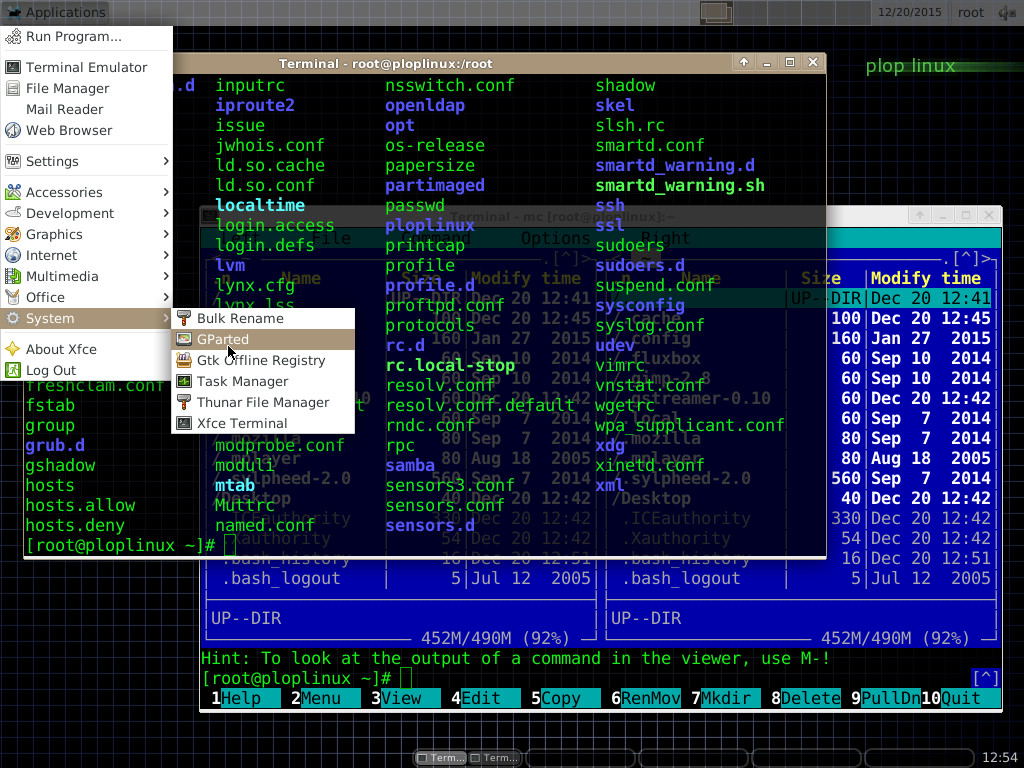 zoom |
Xfce on ARM CPU zoom |
||
Download
Current version: 26.2, 07/Apr/2026
Plop Linux License, Changelog, Package Changelog, Program Packages, md5sum
ARM, armv6l, 32-bit
| Extract/Install | ploplinux-desktop-26.2-arm.tar.gz | 3.59 GB |
| Hard disk image | ploplinux-26.2-arm.img.xz | 2.22 GB, uncompressed 10 GB |
| Kernel, boot files | arm-boot.tar.gz | 298.14 MB, Banana Pi, Cubietruck, Qemu, Raspberry Pi, Odroid XU4 |
Source codes, release tools
| Web directory | Source Codes | |
| Compile scripts only | ploplinux-nosrc-26.2.tar.gz | 52.98 MB |
| Source code files, compile scripts | ploplinux-src-26.2.tar.gz | 6.05 GB |
| Release tools and scripts | ploplinux-release-26.2.tar.gz | 311.00 MB |
Differences to i486, x86_64
| Version | Architecture | Kernel | Libc & GCC | Software |
| i486 | x86 / 32-bit | 6.19.11 | 32-bit | |
| x86_64 | x86 / 64-bit | 6.19.11 | Multiarch 32/64-bit | |
| ARM | armv6l |
QEMU: 4.2.8 Raspberry Pi 1/2/3/4: 6.6.51 Banana Pi: 4.2.3 Cubietruck: 4.4-rc1 Odroid XU4: 4.14.55-135 |
32-bit | Removed: - LILO - GRUB - Syslinux - Blender |
The programs LILO, GRUB, Syslinux, Blender and Vivaldi are not available in the ARM version. All other programs are the same as for i486/x86_64. The lightweight browser Netsurf is used as default web browser.
QEMU
This section describes how you run Plop Linux for ARM in QEMU and how to build an ARMv6l Kernel to boot with QEMU.
Linux Kernel version: 4.2.8
Boot Plop Linux for ARM in QEMU
Required files:
ploplinux-26.2-arm.img.xz ~1.5 GB, the image file
arm-qemu-zImage ARMv6l Linux Kernel for QEMU
arm-qemu-boot.sh Start script
Uncompress the image file with 'xz -d ploplinux-26.2-arm.img.xz'. Note: This file became a size of 10GB.
Start QEMU with 'sh arm-qemu-boot.sh arm-qemu-zImage ploplinux-26.2-arm.img'.
Compile the Linux Kernel for ARMv6l to run in QEMU
Required files:
tools.tar.gz Cross compile tool chain
shell.sh Environment setup
linux-4.2.8.tar.xz Linux Kernel
arm-qemu-linux-4.2.8.patch ARMV6l config patch
config-add Additional config settings
You have to setup the Cross Compile Tool Chain. See Cross compile Linux Kernel.
Start 'shell.sh' to open the cross compile shell.
Extract the Linux Kernel.
You have to patch the Kernel config to create an ARMv6l Kernel. When you don't patch then you get a ARMv5l Kernel.
Patch the Kernel: patch -p1 < arm-qemu-linux-4.2.8.patch
Create the base configuration: make versatile_defconfig
Add additional config settings: cat config-add > .config
Run 'make menuconfig'.
If required add drivers.
Exit the configuration program and save the configuration.
Run 'make zImage' to compile the Kernel.
You find the Linux Kernel file in 'arch/arm/boot/'. The file name is 'zImage'. Rename it to 'arm-qemu-zImage' and use it to boot with QEMU.
Note: To compile the modules run 'make modules && make modules_install'. You find the modules in the directory 'kernel-modules/' where you started 'shell.sh'.
Linux Kernel compile error: warning: "__LINUX_ARM_ARCH__" is not defined [-Wundef]
This happens when you patch the kernel with the QEMU patch after you already configured the kernel. Just run 'make clean' to cleanup and then reconfigure the kernel. After that, the compile should run flawless.
Raspberry Pi, GPU userland apps and camera tools
This section describes how you run install Plop Linux on the Raspberry Pi, how you cross compile the Linux Kernel for the Raspberry Pi and how you compile/install some Raspberry Pi related tools.
Supported Raspberry Pi models: 1-4
Install Plop Linux
Plop Linux is for advanced Linux users. The install documentation does not describe every step with commands. When it's too difficult for people then I will update this page with more details.
Boot a Linux on a computer with a SD card reader.
Download ploplinux-desktop-26.2-arm.tar.gz and raspberry-pi-boot.tar.gz
• On the SD Card, create partition 1 with about 150 MB. Partition type: 0x0C (FAT partition). This will be the boot partition
• On the SD Card, create partition 2 for Plop Linux. Minimum size is 16 GB (or 3 GB without /opt).
• Create a FAT file system on the first partition 'mkfs -F 32 /dev/PARTITION1' (the boot partition).
Note: /dev/PARTITION1 is only a placeholder. You have to set the device node of your partition. Example: /dev/sdd1
• Create an Ext3 file system on the second partition 'mkfs.ext3 /dev/PARTITION2' (the Plop Linux partition).
Note: /dev/PARTITION2 is only a placeholder. You have to set the device node of your partition. Example: /dev/sdd2
• Mount the second Partition (Plop Linux partition) to '/mnt'.
• Extract the ploplinux-desktop-26.2-arm.tar.gz archive to '/mnt'.
• Move the directories in '/mnt/ploplinux-desktop-26.2-arm/' one directory up that they became the root directories on the Plop Linux partition.
• Remove the empty '/mnt/ploplinux-desktop-26.2-arm/' directory.
• Mount the first partition (boot partition) to '/mnt/boot'.
• Extract the raspberry-pi-boot.tar.gz archive to '/mnt'.
• A few important files (the default settings should be ok):
Modify boot parameters in the file '/mnt/boot/cmdline.txt'.
Edit '/mnt/etc/fstab' to your system setup.
Edit the Raspberry Pi section in '/mnt/etc/rc.local'.
• Unmount '/mnt/boot'.
• Unmount '/mnt'.
Now boot your Raspberry Pi with the SD Card. Continue with the personalisation of your fresh system. See here for general Plop Linux Desktop configurations and here for ARM related configurations.
Raspberry Pi 4 - Boot 32 bit / 64 bit
The Raspberry Pi 4 has a 64 bit CPU. To boot with the 32 bit kernel, write into '/boot/config.txt'
[all]
arm_64bit=0
To boot with the 64 bit kernel use
[all]
arm_64bit=1
Raspberry Pi 4 - No HDMI output
Add at the beginning of the file '/boot/config.txt' the following line to activate the HDMI output.
hdmi_force_hotplug=1
Compile the Linux Kernel
Either compile the Linux Kernel on your Raspberry Pi (slow) or you have to setup a cross compile environment (see here) on your computer.
• When you use the cross compile environment, then start the 'shell.sh' script.
• Download the Linux Kernel Source Code for Raspberry Pi and extract it.
Use git: git clone --depth 1 git://github.com/raspberrypi/linux.git
Or download linux.tar.xz
• Change to the Linux Kernel directory 'cd linux' and setup base configuration
For Raspberry Pi 1: make bcmrpi_defconfig
Or download the .config used by Plop Linux and copy the file to the 'linux' directory.For Raspberry Pi 2: KERNEL=7 make bcm2709_defconfig
Note: To add additional configurations run 'make menuconfig'.
• To compile the kernel run 'make && make modules_install'
Note: 'make modules_install' installs the kernel modules. When you compile on the Raspberry Pi then the modules will be installed to '/lib/modules'. When you compile in the cross compile environment then you find the modules in the 'kernel-modules/' directory where you started the 'shell.sh' script.
• You find the Linux Kernel file in the 'arch/arm/boot/' directory. The file name is 'zImage'. Rename it to 'kernel.img'.
• Copy the 'kernel.img' file to the boot partition of your Raspberry Pi.
Note: When you compile in a cross compile environment, then an easy way to transfer the files
to your running Raspberry Pi is using sshfs.
Mount example (Rasperry Pi IP: 10.0.0.208): sshfs root@10.0.0.208:/ /mnt
GPU userland apps and camera tools
Compile the tools on your Raspberry Pi or in a cross compile environment.
Get the latest version from the git repository or download the package raspberry-pi-tools.tar.gz and extract it. You can also download the individual files from here.
To compile and install the GPU userland and the Python camera modules at once run the script '000_all'.
sh 000_all
The build scripts are
010_b_setuptools: Install the Python setup tools
020_b_picamera: Install the Python Raspberry Pi Camera modules
030_b_userland: Compile, patch and install the GPU userland apps (raspistill, raspivid, raspiyuv, ...)
Finally copy the file '.bash_RaspberryPI' to your home directory and add the line
. ~/.bash_RaspberryPI
to the end of your '.bash_profile' file.
This script adds environment variables for the userland apps. Log out and log in to activate the environment variables.
Additional infos
000_src/userland-plop.patch: Patch the userland to fix the vcos.h problems. It also creates a new build script.
001_git-userland: Get the latest GPU userland source code.
Additional resources
https://pypi.python.org/pypi/setuptools#downloads
https://pypi.python.org/pypi/picamera
https://github.com/raspberrypi
https://github.com/polaco1782/raspberry-qemu
Banana Pi
This section describes
- How you install Plop Linux on the Banana Pi.
- Building the boot.scr file.
- Set the green Banana Pi led.
Linux Kernel version: 4.2.3
Install Plop Linux
Plop Linux is for advanced Linux users. The install documentation does not describe every step with commands. When it's too difficult for people then I will update this page with more details.
Boot a Linux on a computer with a SD card reader.
Download ploplinux-desktop-26.2-arm.tar.gz and banana-pi-boot.tar.gz.
• On the SD Card, create one partition for Plop Linux.
• Create an Ext3 file system on the mkfs.ext3 /dev/PARTITION1. Minimum size is 16 GB (or 3 GB without /opt).
Note: /dev/PARTITION1 is only a placeholder. You have to set the device node of your partition. Example: /dev/sdd1
• Mount the partition to /mnt
• Extract the ploplinux-desktop-26.2-arm.tar.gz archive to /mnt
• Move the directories in /mnt/ploplinux-desktop-26.2-arm/ one directory up that they became the root directories on the Plop Linux partition.
• Remove the empty /mnt/ploplinux-desktop-26.2-arm/ directory.
• Extract the banana-pi-boot.tar.gz archive to /mnt
• Install the U-Boot boot loader. Change to /mnt/boot and run dd if=u-boot-sunxi-with-spl.bin of=/dev/SDCARD bs=1024 seek=8
Note: /dev/SDCARD is only a placeholder. You have to set the device node of your SD Card. Example: /dev/sdd
Note: I am using the U-Boot binary and the kernel of armbian.
• A few important files (the default settings should be ok):
Edit /mnt/etc/fstab to your system setup.
Edit the Banana Pi section in /mnt/etc/rc.local.
• Unmount /mnt
Now boot your Banana Pi with the SD card. Continue with the personalisation of your fresh system. See here for general Plop Linux Desktop configurations and here for ARM related configurations.
Building boot.scr
Modify the file /etc/boot.cmd for your needs.
To create the boot.scr file run mkimage -C none -A arm -T script -d boot.cmd boot.scr
Banana Pi green led
The Banana Pi has 1 configurable led. For example SD Card access, CPU usage and much more.
The green led is /sys/class/leds/bananapi:green:usr/
In this directory you find the file trigger file. Run cat trigger to list the possible values. The current setting is marked with square brackets.
Here is the Plop Linux setup from /etc/rc.local.
# Set green led to SD Card actvity
echo mmc0 > /sys/class/leds/bananapi:green:usr/trigger
Cubietruck, USB OTG g_hid, g_mass_storage
This section describes
- How you install Plop Linux on the Cubietruck.
- How you compile the Linux Kernel for the Cubietruck.
- Building the boot.scr file.
- Set the Cubietruck leds.
- Using the USB OTG as HID or mass storage device.
Linux Kernel version: 4.4-rc1
Install Plop Linux
Plop Linux is for advanced Linux users. The install documentation does not describe every step with commands. When it's too difficult for people then I will update this page with more details.
Boot a Linux on a computer with a SD card reader.
Download ploplinux-desktop-26.2-arm.tar.gz and cubietruck-boot.tar.gz.
• On the SD Card, create one partition for Plop Linux.
• Create an Ext3 file system on the 'mkfs.ext3 /dev/PARTITION1'. Minimum size is 16 GB (or 3 GB without /opt).
Note: /dev/PARTITION1 is only a placeholder. You have to set the device node of your partition. Example: /dev/sdd1
• Mount the Partition to '/mnt'.
• Extract the ploplinux-desktop-26.2-arm.tar.gz archive to '/mnt'.
• Move the directories in '/mnt/ploplinux-desktop-26.2-arm/'. one directory up that they became the root directories on the Plop Linux partition.
• Remove the empty '/mnt/ploplinux-desktop-26.2-arm/' directory.
• Extract the cubietruck-boot.tar.gz archive to '/mnt'
.• Install the U-Boot boot loader. Change to '/mnt/boot' and run 'dd if=u-boot-sunxi-with-spl.bin of=/dev/SDCARD bs=1024 seek=8'
Note: /dev/SDCARD is only a placeholder. You have to set the device node of your SD Card. Example: /dev/sdd
Note: I am using the U-Boot binary of ARCH Linux.
• A few important files (the default settings should be ok):
Edit '/mnt/etc/fstab' to your system setup.
Edit the Cubietruck section in '/mnt/etc/rc.local'.
• Unmount '/mnt'.
Now boot your Cubietruck. Continue with the personalisation of your fresh system. See here for general Plop Linux Desktop configurations and here for ARM related configurations.
Notes about Linux Kernel releases
The kernel that comes with Plop Linux does not support all Cubietruck features. The stable kernel 3.4. for Cubietruck should support the hardware features, but cannot be compiled with the latest GCC. The 3.4. kernel is not part of Plop Linux.
The latest kernel release 4.9. does not poweroff the Cubietruck.
Poweroff works with 4.4.rc-1 which comes with Plop Linux.
Compile the Linux Kernel
Either compile the Linux Kernel on your Cubietruck (slow) or you have to setup a cross compile environment (see here) on your computer.
• When you use the cross compile environment, then start the 'shell.sh' script.
• Download the Linux Kernel Source Code for the Cubietruck.
The stable Kernel: git clone https://github.com/cubieboard/linux-sunxi.git
The next Kernel: git clone https://github.com/linux-sunxi/linux-sunxi.git -b sunxi-next
Or download and extract the Kernel Source Code (used by Plop Linux) linux-sunxi-next.tar.xz
• Change to the Linux Kernel directory 'cd linux-sunxi' and setup base configuration
Run 'make sunxi_defconfig'.
Or use the Plop Linux config file. Copy .config to the 'linux-sunxi' directory.
Note: To add additional configurations run 'make menuconfig'.
• To compile the kernel run 'make && make modules_install'.
Note: 'make modules_install' installs the kernel modules. When you compile on the Cubietruck then the modules will be installed to '/lib/modules'. When you compile in the cross compile environment then you find the modules in the 'kernel-modules/' directory where you started the 'shell.sh' script.
• You find the Linux Kernel file in the 'arch/arm/boot/' directory. The file name is 'zImage'.
• Copy the 'zImage' file to the '/boot' directory of your Cubietruck.
Note: When you compile in a cross compile environment, then an easy way to transfer the files
to your running Cubietruck is using sshfs.
Mount example (Cubietruck IP: 10.0.0.208): sshfs root@10.0.0.208:/ /mnt
Building boot.scr
Modify the file '/etc/boot.cmd' for your needs.
To create the 'boot.scr' file run 'mkimage -C none -A arm -T script -d boot.cmd boot.scr'.
Cubietruck leds
The Cubietruck has 4 leds and you can set triggers for those leds. For example SD Card access, Bluetooth and much more. There is the blue, white, orange and green led.
Find the leds in '/sys/class/leds/'.
The green led is '/sys/class/leds/cubietruck:green:usr/'.
In this directory you find the file 'trigger' file. Run 'cat trigger' to list the possible values. The current setting is marked with square brackets.
Here is the Plop Linux setup from '/etc/rc.local'.
# Set green led to SD Card actvity
echo mmc0 > /sys/class/leds/cubietruck:green:usr/trigger

# Plop Linux has booted, set orange led on
echo default-on > /sys/class/leds/cubietruck:orange:usr/trigger
USB OTG - HID, mass storage device
Use only an USB OTG cable to connect the OTG port with a computer!
• The Cubietruck as HID
You have to modify the g_hid kernel module source code to enable the HID function. Plop Linux has a working sample g_hid module installed. You find details about the g_hid driver in the kernel documentation file gadget_hid.txt
You have to edit the file 'drivers/usb/gadget/legacy/hid.c' and add
- a hidg_func_descriptor structure
- a platform_device structure
- and "platform_device_unregister (&my_hid);" in the __exit hidg_cleanup(void) function
Download the modified hid.c
Note: When you use the unmodified hid.c, then you will get the error "ERROR: could not insert 'g_hid': No such device" on modprobe g_hid.
Using the g_hid module
Download the test program: hid_gadget_test.c
Compile the test program: gcc hid_gadget_test.c -o hid_gadget_test
Load the g_hid driver: modprobe g_hid
Start the test program: ./hid_gadget_test /dev/hidg0 keyboard
You are now in the prompt of hid_gadget_test and can enter values.
When the Cubietruck is connected to a computer with the USB OTG cable, then the Cubietruck act as a keyboard. Type 'a b c' and then enter on the hid_gadget_test prompt. On the computer should you see the typed text "abc". '--num-lock' toggles the numlock. See gadget_hid.txt for more details.
• The Cubietruck as mass storage device
This is an example with using a disk image file.
Create the disk image file:
- Create a 100MB file: dd if=/dev/zero of=/var/disk.img bs=1M count=100
- Create a file system on the disk image: mkfs.ext3 /var/disk.img
- Mount the image file: mount -o loop /var/disk.img /mnt
- Create a test file on the disk image: echo "Hello there" > /mnt/test.txt
- Unmount the image file: umount /mnt
Enable the USB mass storage:
Run 'modprobe g_mass_storage file=/var/disk.img'.
When the Cubietruck is connected to a computer with the USB OTG cable, then the Cubietruck act as a mass storage device. When you run on the computer 'dmesg' then you should see the entries of the new USB mass storage device. When you mount on the computer the USB device with example 'mount /dev/sdd /mnt', then you should see the created 'test.txt' in the /mnt directory.
Odroid-XU4
Linux Kernel version: 4.14.55-135
Plop Linux runs fine on the Odriod-XU4. The install description comes soon..., but finally you need partition 1 (boot) as FAT32, partition 2 as ext3 or ext4, the boot files and extract the Plop Linux Desktop archive (ARM version) as usual.
Boot files: odroid-xu4-boot.tar.gz
Linux Kernel Source Code: https://github.com/hardkernel/linux/tree/odroidxu4-4.14.y
Fan control script
As default, the fan goes on and off around 52°C, which can be annoying. I wrote a simple fan control script. The script cools the CPU down to a defined temperature and starts the fan on a defined temperature. Add the script to your '/etc/rc.local' to start it at boot time.
Sample: fan-control.sh &
The script catches the -HUP signal and turns the fan and automatic control on, before it ends on the signal.
Download: fan-control.sh
Additional resources
https://wiki.odroid.com/odroid-xu4/odroid-xu4
USB 3 issue
Configurations
The Plop Linux for ARM has a few additional configurations for ARM computers.
/etc/rc.local
The file /etc/rc.local has a few additional commands to the standard Plop Linux rc.local file. It has sections for various devices (Raspberry Pi, Banana Pi, Cubietruck, Odroid XU4). You set the device in the file /etc/device.
SWAP Memory
You can use a partition or a file for swap memory. I prefer a swap file.
The old rule is, the size of the swap memory should be the double of your RAM. Maybe you have to choose a smaller size when you doesn't have enough free space on your drive.
To create a swap file with 1 GB run:
dd if=/dev/zero of=/var/swap bs=1M count=1024
chmod 600 /var/swap
mkswap /var/swap
swapon /var/swap
Remove the # in /etc/fstab at the line with swap to activate the swap at boot time.
WLAN Wi-Fi
You find an example with the Techion WLS 150 WLAN USB Stick here.
Raspberry Pi: Mount boot partition to /boot
The boot partition /dev/mmcblk0p1 is mounted to /boot. You can configure this in the /etc/fstab file.
Raspberry Pi, Banana Pi: Date and time
The Rasperry Pi and Banana Pi cannot keep the time without power. The time has to be set during booting. The correct time is set by calling a NTP server. In the file /etc/rc.local you find the line ntpdate ntp0.fau.de & to set the correct time. It's required to have an internet connection to set the time automatically.
Remove the file /etc/rc.d/rcsysinit.d/S60setclock to avoid the boot error warning about time.
Remove the & after ntpdate ntp0.fau.de to wait until the time has been set to avoid user logins before the time has been set.
Raspberry Pi: Audio
The sound module snd-bcm2835 is loaded by /etc/rc.local to enable the audio device.
Cross compile Linux Kernel
You can cross compile software from your running x86 system to another CPU architecture. There are various ways to cross compile. One solution is to use a tool chain.
The advantages of cross compile are a stable host system in the background and fast compilation times.
Setup the cross compile tool chain
Download the ploplinux-src-26.2.tar.gz file to get the ARM cross compile tool chain and extract it. The tool chain is in the 99-ARM/cross-compile/tool-chain/ directory. You can also download each individual file from here.
git-tools: Download latest ARM cross compile tool chain.
shell.sh: Start a shell with correct environment variables.
tools.tar.gz: ARM cross compile tool chain.
Extract the file tools.tar.gz for the Cross Compile Tool Chain or start git-tools to download the latest version.
Start shell.sh to open a new shell with the correct environment variables. You will see the text CROSS COMPILE SHELL as info.
You can run the x86 programs of your operation system as usual.
To close the environment just type exit. You will see the info CROSS COMPILE END.
Example: Compile the Raspberry Pi Linux Kernel
Download the Raspberry Pi Linux Kernel Source Code: linux.tar.xz
Start shell.sh to open the cross compile shell.
Extract the Linux Kernel Source Code with tar xfJ linux.tar.xz
Change to the Linux Kernel Source directory linux/.
Either run make bcmrpi_defconfig to get a minimal Raspberry Pi Kernel configuration or copy the .config file to the Linux Source Code directory to get an already configured Kernel configuration with modules.
Run make menuconfig to open the Kernel configuration tool. You can add and remove Kernel features.
Run make to compile the Kernel and the Kernel modules.
Run make modules_install to install the modules to the ../kernel-modules/ directory.
You find the Linux Kernel file in arch/arm/boot/ directory. The file name is zImage.
Cross build with chroot
You can Cross Compile from a running system (ex. x86) with chroot to an ARM environment. The advantages are a stable host system in the background, easy data sharing from the host system to the chroot environment, faster compilation when you have a powerful host machine.
You can chroot to the ARM system
- when it's stored in a directory.
- when it's on a hard disk partition.
- when it's on an image of a partition (as loop device).
- when it's on a partition in a hard disk image (as loop device).
You have to work as root to have enough permissions.
I prefer to chroot to a directory. There are no space limits of an image file.
| 1. Requirements |
| 2. Prepare chroot |
| 2.1. Chroot directory |
| 2.2. Chroot partition of a hard disk image |
| 3. How to chroot |
| 4. Additional resources |
1. Requirements
Download the ploplinux-src-26.2.tar.gz file to get the ARM chroot tools and extract it. The chroot tools are in the 99-ARM/cross-compile/chroot-tools/ directory. You can also download each individual file from here.
The archive:
arm/                         <- Chroot to this directory

arm-chroot.sh                <- Use this script to chroot

.bashrc                      <- This adds the red CHRT info to the command
			        shell when you chroot to the ARM system

mount.sh                     <- Mount a partition in a hard disk image without
                                chroot environment setup (as loop device)

qemu-static/                 <- Static QEMU to emulate the ARM CPU

qemu-wrapper/                <- Wrapper to run QEMU with the required parameters

setup-arm-emu-hdimage.sh     <- Script to setup the chroot environment for a
                                partition in a hard disk image (as loop device)

setup-arm-emu-local.sh       <- Script to setup the chroot environment for a
                                directory
Compile the qemu-wrapper: Change to the qemu-wrapper/ directory. Run sh make-qemu-wrapper
Change to the qemu-static/ directory and extract the QEMU program for the system you want to emulate. The QEMU program for ARM qemu-arm-static is already extracted.
2. Prepare chroot
2.1. Chroot directory
When you want to use the chroot just with a directory and no image or hard disk, then extract the ARM system to the arm/ directory.
Plop Linux for ARM: ploplinux-desktop-26.2-arm.tar.gz
Copy the file qemu-static/qemu-arm-static and qemu-wrapper/qemu-wrapper to the directory arm/usr/bin/.
Preparations done, see below how to chroot.
2.2. Chroot to a partition of a hard disk image
When you want to chroot to a partition in a hard disk image then you have to mount the partition as loop device with an offset.
Download the (compressed) hard disk image: ploplinux-26.2-arm.img.xz
Uncompress the file (warning, the file became 10GB): xz -d ploplinux-26.2-arm.img.xz
You have to figure out the start of the system partition.
Run fdisk ploplinux-26.2-arm.img
Use the command p to print the partition layout
Welcome to fdisk (util-linux 2.27).
Changes will remain in memory only, until you decide to write them.
Be careful before using the write command.


Command (m for help): p
Disk ploplinux-26.2-arm.img: 10 GiB, 10737418240 bytes, 20971520 sectors
Units: sectors of 1 * 512 = 512 bytes
Sector size (logical/physical): 512 bytes / 512 bytes
I/O size (minimum/optimal): 512 bytes / 512 bytes
Disklabel type: dos
Disk identifier: 0xf1ec283e

Device                              Boot Start      End  Sectors Size Id Type
ploplinux-26.2-arm.img1        *     2048 20971519 20969472  10G 83 Linux

Command (m for help):
There is one partition. You see the start value of 2048. Edit the mount.sh and setup-arm-emu-hdimage.sh scripts and set the PARTITION_START_OFFSET variable.
File: mount.sh
#!/bin/sh

ROOT_DIR=arm

IMAGE_FILE=ploplinux-26.2-arm.img
PARTITION_START_OFFSET=2048
IMAGE_BLOCKSIZE=512

mount -o loop,offset=$[$PARTITION_START_OFFSET*$IMAGE_BLOCKSIZE] $IMAGE_FILE $ROOT_DIR/
File: setup-arm-emu-hdimage.sh
#!/bin/sh

ROOT_DIR=arm

IMAGE_FILE=ploplinux-26.2-arm.img

PARTITION_START_OFFSET=2048
IMAGE_BLOCKSIZE=512

SHARE=/root


mount binfmt_misc -t binfmt_misc /proc/sys/fs/binfmt_misc
echo ':arm:M::\x7fELF\x01\x01\x01\x00\x00\x00\x00\x00\x00\x00\x00\x00\x02\x00\x28\x00:\xff\xff\xff\xff\xff\xff\xff\x00\xff\xff\xff\xff\xff\xff\xff\xff\xfe\xff\xff\xff:/usr/bin/qemu-wrapper:' > /proc/sys/fs/binfmt_misc/register

mount -o loop,offset=$[$PARTITION_START_OFFSET*$IMAGE_BLOCKSIZE] $IMAGE_FILE $ROOT_DIR/


mount --bind /proc $ROOT_DIR/proc..
mount --bind /tmp $ROOT_DIR/tmp..
mount --bind /sys $ROOT_DIR/sys..
mount --bind /dev $ROOT_DIR/dev..
mount --bind /dev/pts $ROOT_DIR/dev/pts..

#if required, bind the system /root directory to the chroot environment
#mount --bind $SHARE $ROOT_DIR/mnt
Mount the partition to the arm/ directory with starting the script mount.sh.
Copy the file qemu-static/qemu-arm-static and qemu-wrapper/qemu-wrapper to the directory arm/usr/bin/.
Preparations done, see next section how to chroot.
3. How to chroot
To enable the chroot environment you have to start the script
- setup-arm-emu-local.sh - when the ARM system is extracted in the arm/ directory.
- or setup-arm-emu-hdimage.sh - when the ARM system is on a partition in a hard disk image.
Then run arm-chroot.sh to do the chroot. Do a lscpu to see the emulated CPU information.
Now you can start programs on the ARM system. Start the Midnight Commander mc to speed up your navigation on the ARM system. You can compile programs in the same way, as the emulated hardware would be real.
You can run arm-chroot.sh parallel in other terminals to work parallel on the ARM system.
4. Additional resources
http://community.arm.com/groups/embedded/blog/2013/11/21/cross-compilation-for-arm
https://wiki.debian.org/QemuUserEmulation
Hardware
WLAN
Techion WLS 150 WLAN USB Stick.
Raspberry Pi
I am using a Raspberry Pi model B+.
SD Cards:
- SAMSUNG microSDHC EVO 32GB Kit, UHS-I/Class 10
- KINGSTON Micro SDHC 16GB
Cubietruck / Cubieboard 3
SD Card:
- SAMSUNG microSDHC EVO 32GB Kit, UHS-I/Class 10
Banana Pi
SD Card:
- SAMUNG microSDHC-Card 16GB - Class 10
© 2026 by
Elmar Hanlhofer
This page was last modified on 07/Apr/2026.