| English / Deutsch | Print version |  |
MacBook Pro
Note: this is a raw text, written quickly. It needs a lot of updates.
This is a short description, how to install Plop Linux and a dual boot with Mac OSX on the MacBook Pro. Default boot is Plop Linux. I describe only what I needed for myself.
Booting Plop Linux from USB works out of the box since Plop Linux 4.3.5. WiFi does not work with the standard release. As the WiFi driver is not open source, you have to add it by yourself. See below how to compile it.
When I have time, I will add screenshots and more. But now, its just to have it documented.
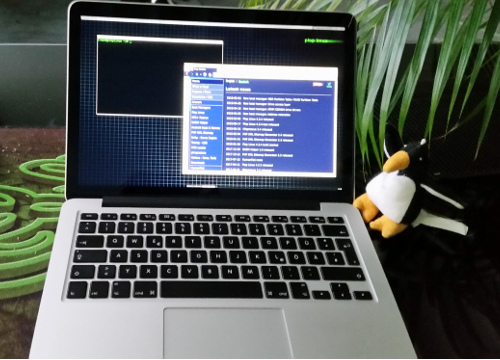
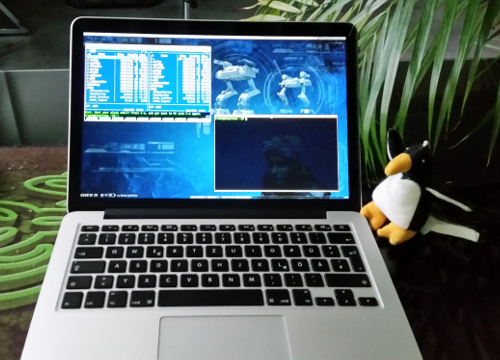
| Some eye candy |
| Install process |
| fn, F1-F12 keys |
| Boot without Grub2 |
| fstab and /boot |
| WiFi |
| Webcam |
| Sound and microphone |
| Battery |
| Display brightness |
| Keyboard light |
| Power on sound |
Some eye candy


Install process
Backup your data!
Connect an USB thumb drive with Plop Linux Live 25.2. Also put the desktop tar.gz, the kernel source code, the WiFi driver and the patches onto the USB drive.
WiFi Driver (Debian repository): broadcom-sta_6.30.223.271.orig.tar.xz
WiFi Driver Patches (Arch Linux repository): broadcom-wl-dkms-6.30.223.271-18-x86_64.pkg.tar.xz
Restart the MacBook Pro and keep the "alt" key pressed, to open the boot menu.
Choose the USB drive.
Plop Linux boots....
Start Xfce with "startx".
Start "GParted".
Shrink the Mac OSX partition (sda2). I shrinked it to 100 GB.
Create a new partition, formatted with ext3. This became the Plop Linux partition.
Mount the new partition. I suggest to run the command "automount", which also mounts another file system that is required later.
Go to "/mnt/sda4" and extract the Plop Linux desktop archive from the USB drive to the disk drive as known from the usual desktop installation.
Now there are two options.
Option 1: Use Grub2 as boot manager to start Linux.
Option 2: Create a custom kernel to start Linux.
In the first stage you should use Grub2 as loader and then you can create a custom kernel to boot without Grub2.
Copy from the USB thumb drive the directories "efi" and "syslinux" to "/mnt/sda1/"
Note: To create a fresh bootx64.efi run 'grub-mkstandalone -O x86_64-efi -o bootx64.efi'.
Edit the file "/mnt/sda1/efi/grub/grub.cfg" and add the following lines to boot Plop Linux.
menuentry "Plop Linux Desktop" {
        set gfxpayload=keep
        linux   /syslinux/kernel/bzImage root=/dev/sda4
}
Now reboot and keep the "alt" key pressed to open the boot menu.
Choose the hard disk with the name "EFI boot".
Now you should see the Grub2 menu. Choose "Plop Linux Desktop" to boot Plop Linux.
First steps are done. Next is setup the F keys, boot without Grub2, set default boot the Plop Linux, get WiFi working, setup keyboard light.
fn, F1-F12 keys
The multimedia buttons are not working out of the box. Personally, I don't need those keys. I prefer to have the keys F1-F12 without the need to press fn.
To switch the function key behaviour, change the value in the file "/sys/module/hid_apple/parameters/fnmode". Valid values are 0, 1 ,2. To set F1-F12 as default mode, set the value 2. To set this during booting, add the following line to "/etc/rc.local".
echo 2 > /sys/module/hid_apple/parameters/fnmode
Just a note about some missing keys on the keyboard:
DEL: fn backspace
INS: fn enter
POS1: fn cursor left
END: fn cursor right
Page up: fn cursor up
Page down: fn cursor down
See also how-to-swap-the-fn-use-of-function-keys-on-an-apple-keyboard-in-linux
Boot without Grub2
You have to recompile the kernel to boot without Grub or anoter Linux loader.
Grab the kernel file from your USB drive and extract it. Change into the kernel source code directory and get the kernel config file.
zcat /proc/config.gz > .config
Start the configuration program with 'make menuconfig'. Go to 'Processor type and features'. Move down to 'Built-in kernel command line'. Set the value
root=/dev/sda4
Choose "Exit" two times and save the new configuration.
Build the new kernel and modules with 'make && make modules_install'.
Mount the partition /dev/sda1 and copy the kernel file 'arch/x86/boot/bzImage' to the mounted sda1 partition into the directory '/efi/boot'.
The file 'bootx64.efi' is the Grub2 boot manager. Rename 'bzImage' to 'bootx64.efi' to overwrite Grub2.
We have to add the file information to the EFI boot loader to setup the default boot.
efibootmgr command: efibootmgr -c -d /dev/sda -p 1 -L "Plop Linux" -l "\efi\boot\bootx64.efi"
-c: Create a new entry
-d: Device with the boot file
-p: Partition number
-L: Label
-l: File with the full path. You have to use the backslash here!
The new entry will be automatically the default boot. See EFI - General remarks, Kernel, efibootmgr, Grub2 for more efibootmgr commands.
fstab and /boot
Replace the second line of '/etc/fstab' with
/dev/sda1 /boot vfat defaults 1 0
WiFi
If you did not recompile the kernel, then you have to do this now. See 'Boot without Grub2'. Setup the built-in kernel command line and the other things later don't have to be done.
Extract the WiFi Driver broadcom-sta_6.30.223.271.orig.tar.xz and the patches broadcom-wl-dkms-6.30.223.271-18-x86_64.pkg.tar.xz.
Copy the patches from 'usr/src/broadcom-wl-6.30.223.271/patches' to 'broadcom-sta-6.30.223.271/amd64'.
Execute all patches in 'broadcom-sta-6.30.223.271/amd64'.
for i in *.patch; do patch -p1 < $i; done
Add at the top of the file 'broadcom-sta-6.30.223.271/amd64/src/wl/sys/wl_cfg80211_hybrid.c' the line '#define get_ds() (KERNEL_DS)'.
Change to 'broadcom-sta-6.30.223.271/amd64/'.
Compile and install the driver with "make && make install && depmod -a".
Add the following lines to the file '/etc/modprobe.d/blacklist.conf' to avoid driver loading conflicts.
blacklist ssb
blacklist bcma
blacklist b43
blacklist brcmsmac
Create the WiFi configuration with your settings 'wpa_passphrase MYNETSSID MYPASS > /etc/wpa_supplicant.conf'.
Add the following lines to the file '/etc/rc.local' before the 'exit' command to autostart WiFi.
ifconfig wlp3s0 up
wpa_supplicant -B -Dwext -i wlp3s0 -c/etc/wpa_supplicant.conf
sleep 2
dhclient wlp3s0
Reboot. WiFi should work now.
Webcam
You need additional kernel modules. These will be added as default in further releases.
Start the kernel configure tool and add
Device Drivers / Multimedia support
    [*]   V4L platform devices
and recompile with 'make -j 4 && make modules_install'. Then copy the new 'arch/x86/boot/bzImage' to '/boot/EFI/boot/boot64.efi'. Reboot.
Now you need the webcam driver.
git clone https://github.com/patjak/facetimehd-firmware.git

cd facetimehd-firmware
sed -i -e 's/# Ty/echo #/g' Makefile
make && make install
cd ..


git clone https://github.com/patjak/bcwc_pcie.git

cd bcwc_pcie
make && make install

depmod -a
modprobe -r bdc_pci
modprobe facetimehd
The webcam should work now.
Add the following line to the file '/etc/modprobe.d/blacklist.conf' to avoid driver loading conflicts.
blacklist bdc_pci
Add to your '/etc/rc.local' this line to load the webcam drivers during boot.
modprobe facetimehd
Sound and microphone
Create the file '/etc/modprobe.d/alsa-base.conf' with the content
options snd-hda-intel model=mbp101
mbp101 stands for MacBook Pro 10.1.
How to find the option:
You have to find the correct codec for the sound card with: cat /proc/asound/card*/codec*|grep Codec
Codec: Intel Haswell HDMI
Codec: Cirrus Logic CS4208
We need the parameter for 'Cirrus Logic CS4208'. You find the correct option parameter on the page https://www.kernel.org/doc/html/latest/sound/hd-audio/models.html
Next, set the second sound card as default card.
Create the file '/etc/asound.conf' with the content
pcm.!default {
    type hw
    card 1
}

ctl.!default {
    type hw
    card 1
}
Or this should work too for '/etc/asound.conf':
defaults.pcm.card 1 defaults.ctl.card 1
Troubleshooting: No microphone
Check the microphone status with amixer. Maybe the capture flag is not set.
Example: Show controls with 'amixer scontrols'
Simple mixer control 'Master',0
Simple mixer control 'Headphone',0
Simple mixer control 'Speaker',0
Simple mixer control 'Bass Speaker',0
Simple mixer control 'PCM',0
Simple mixer control 'Mic Boost',0
Simple mixer control 'IEC958',0
Simple mixer control 'IEC958 Default PCM',0
Simple mixer control 'Capture',0
Simple mixer control 'Auto-Mute Mode',0
Simple mixer control 'Digital',0
Simple mixer control 'Internal Mic Boost',0
There is the control 'Capture'. Thats the microphone.
Run 'amixer sget Capture'
Simple mixer control 'Capture',0
  Capabilities: cvolume cswitch
  Capture channels: Front Left - Front Right
  Limits: Capture 0 - 63
  Front Left: Capture 63 [100%] [12.00dB] [off]
  Front Right: Capture 63 [100%] [12.00dB] [off]
You see '[off]'. That means, the microphone is not enabled.
Enable the microphone with 'amixer -c 1 sset Capture,0 80% unmute cap'
Simple mixer control 'Capture',0
  Capabilities: cvolume cswitch
  Capture channels: Front Left - Front Right
  Limits: Capture 0 - 63
  Front Left: Capture 50 [79%] [-1.00dB] [on]
  Front Right: Capture 50 [79%] [-1.00dB] [on]
When you see '[on]', then the microphone has been enabled.
Do a test record: arecord -f S32_LE -r 16000 -d 5 -c 2 --device=hw:1,0 /tmp/test.wav
Play the test: mplayer /tmp/test.wav
Note: These commands are for the second sound card of the Mac Book Pro 10.1. Use 'aplay -l' and 'arecord -l' for other devices.
Battery
Add the Battery Monitor to the panel in Xfce. It works out of the box.
Display brightness
You can change the display brightness with the script 'bl-brightness'. You find the script in '/usr/share/macbook'. You can copy the file to '/usr/bin' to have it in your path.
Usage: bl-brightness <up|down>
Keyboard light
You can change the keyboard light with my script 'kbd-light'. You find the script in '/usr/share/macbook'. You can copy the file to '/usr/bin' to have it in your path.
kbd-light <percent>
The percent value goes from 0 to 100.
Power on sound
Disabling the awful power on sound (chime) did not work with the nvram command, as descibed in the web.
Finally, I booted Mac OSX and turned off the volume with the F10 key. Then there was silence :)
© 2026 by
Elmar Hanlhofer