| English / Deutsch | Print version |
Boot Microsoft Windows from VHD with PBM6
This article describes how to install Microsoft Windows to a VHD and boot it with PBM6. I use VirtualBox to install Microsoft Windows to a VHD file.
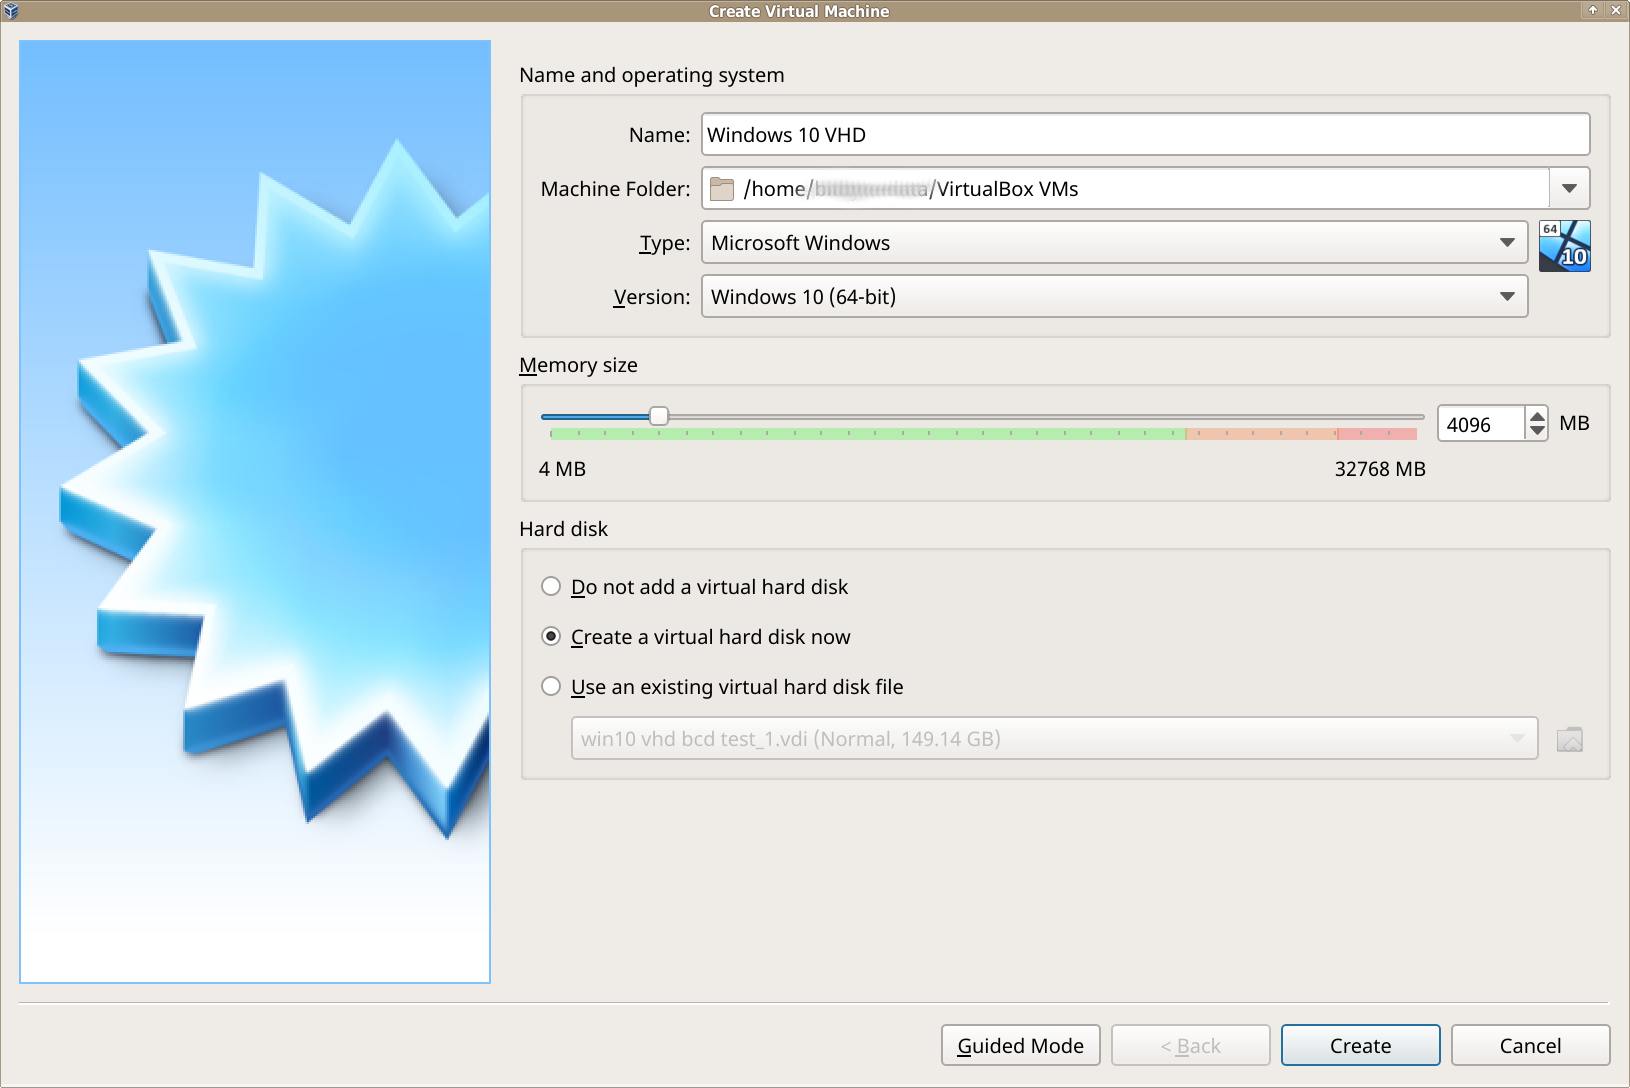
Create a virtual machine
Create a virtual machine to install Microsoft Windows. Use at minimum 4096 MB memory.
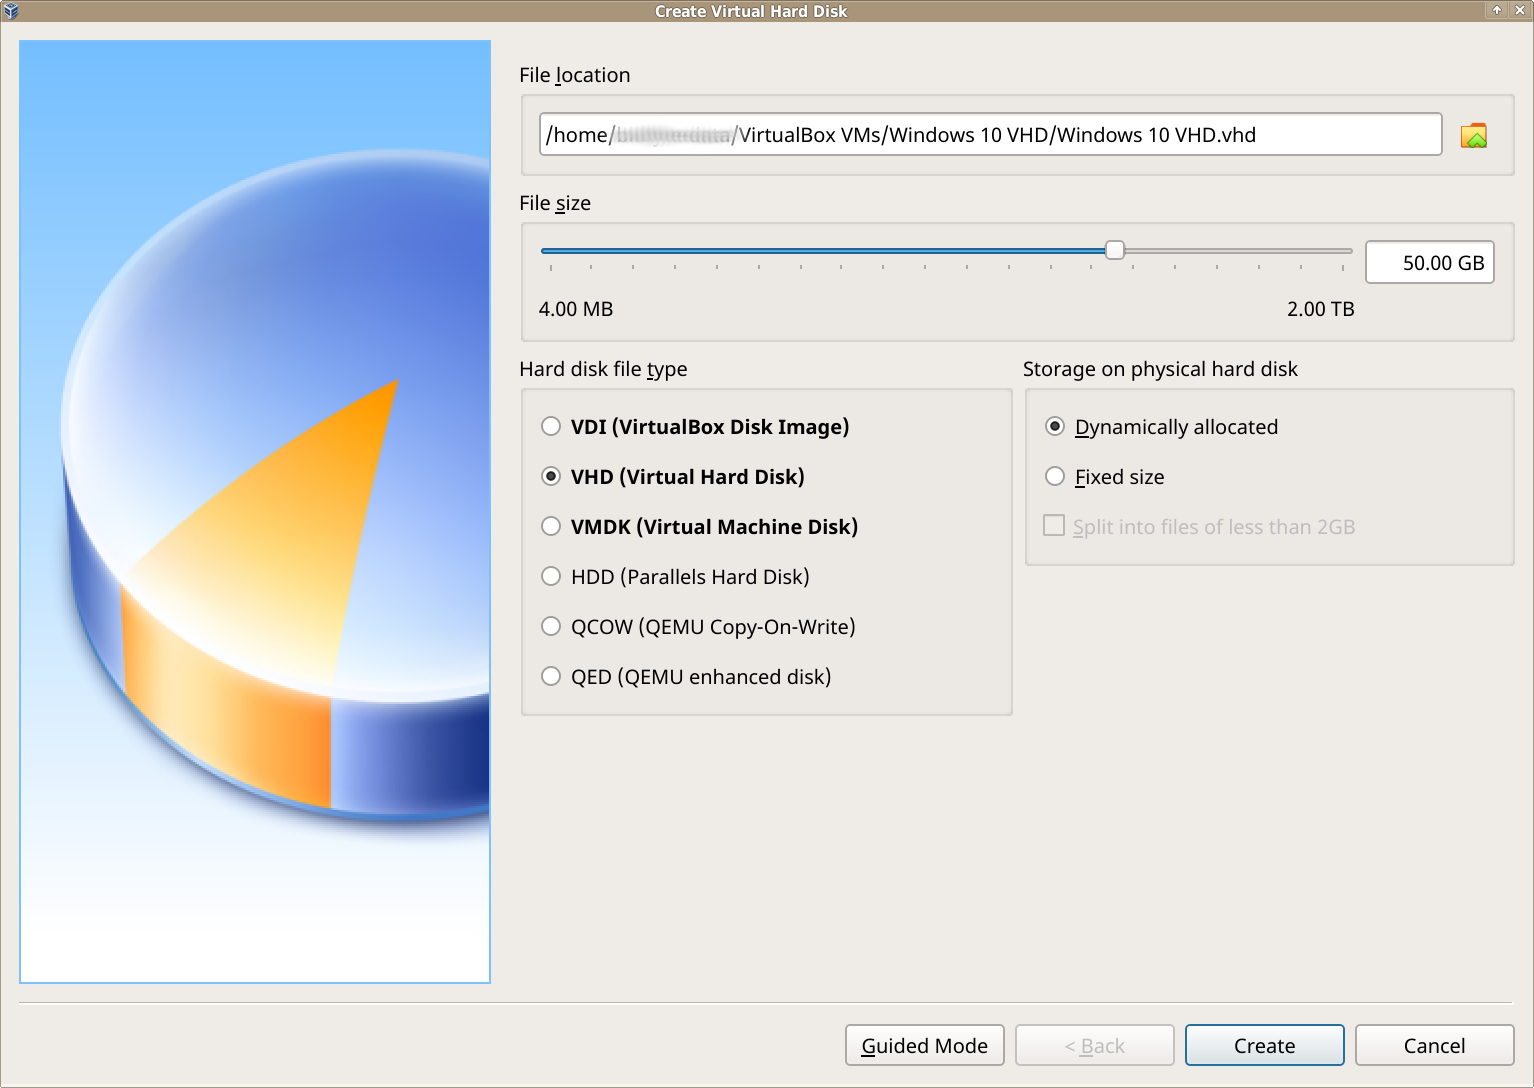
VHD file
Set hard disk file type to VHD.
Choose "Dynamically allocated". The VHD image will grow when you add data to the image file.
Choose "Fixed size" and "Split into files of less than 2GB" when you want to put the VHD file on an file system like FAT32.
Click Create to finish the creation of the virtual machine.
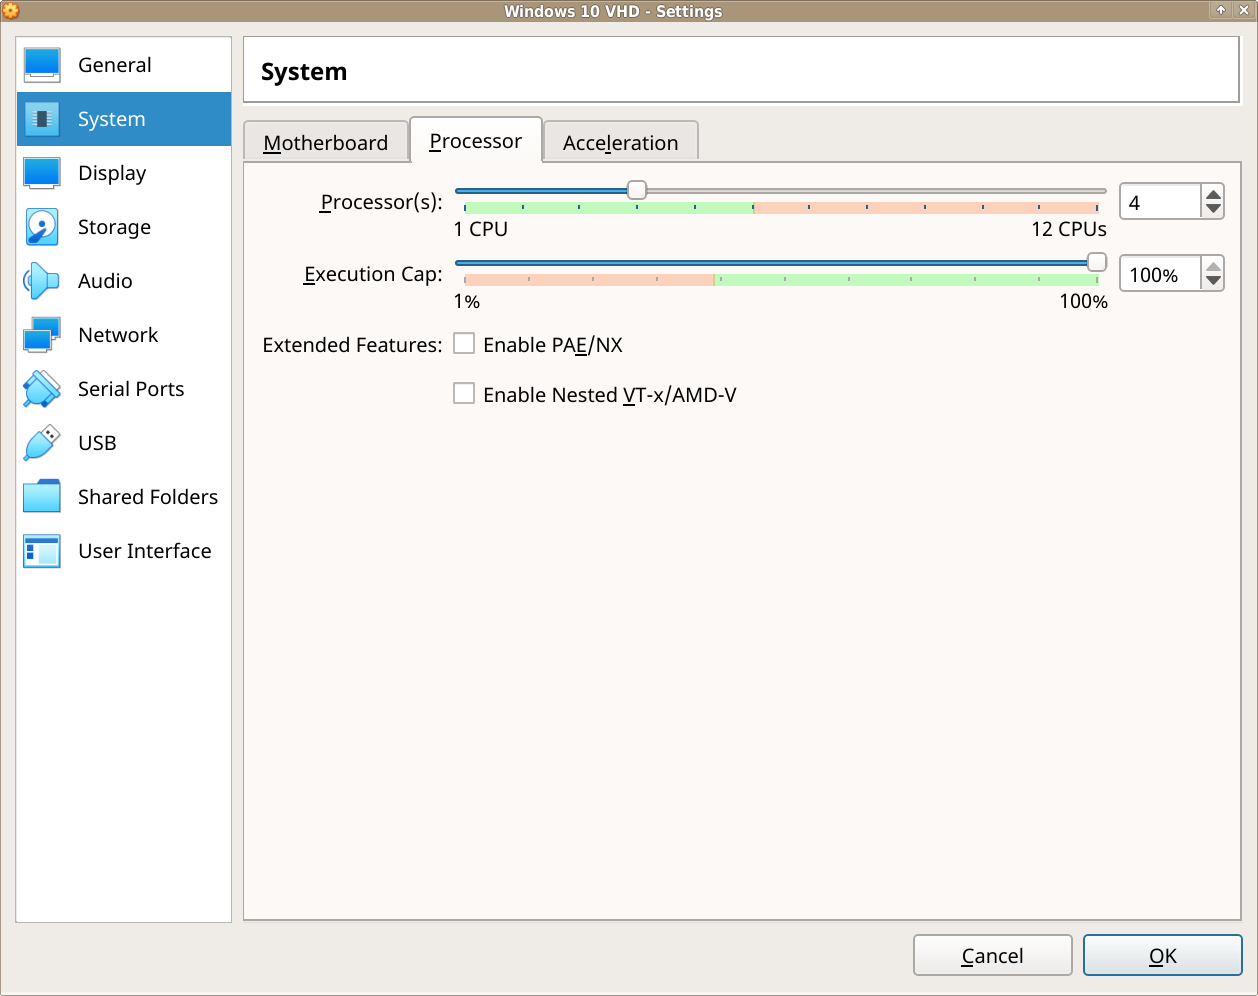
Speed up install process
Add more virtual CPUs to speed up Microsoft Windows.
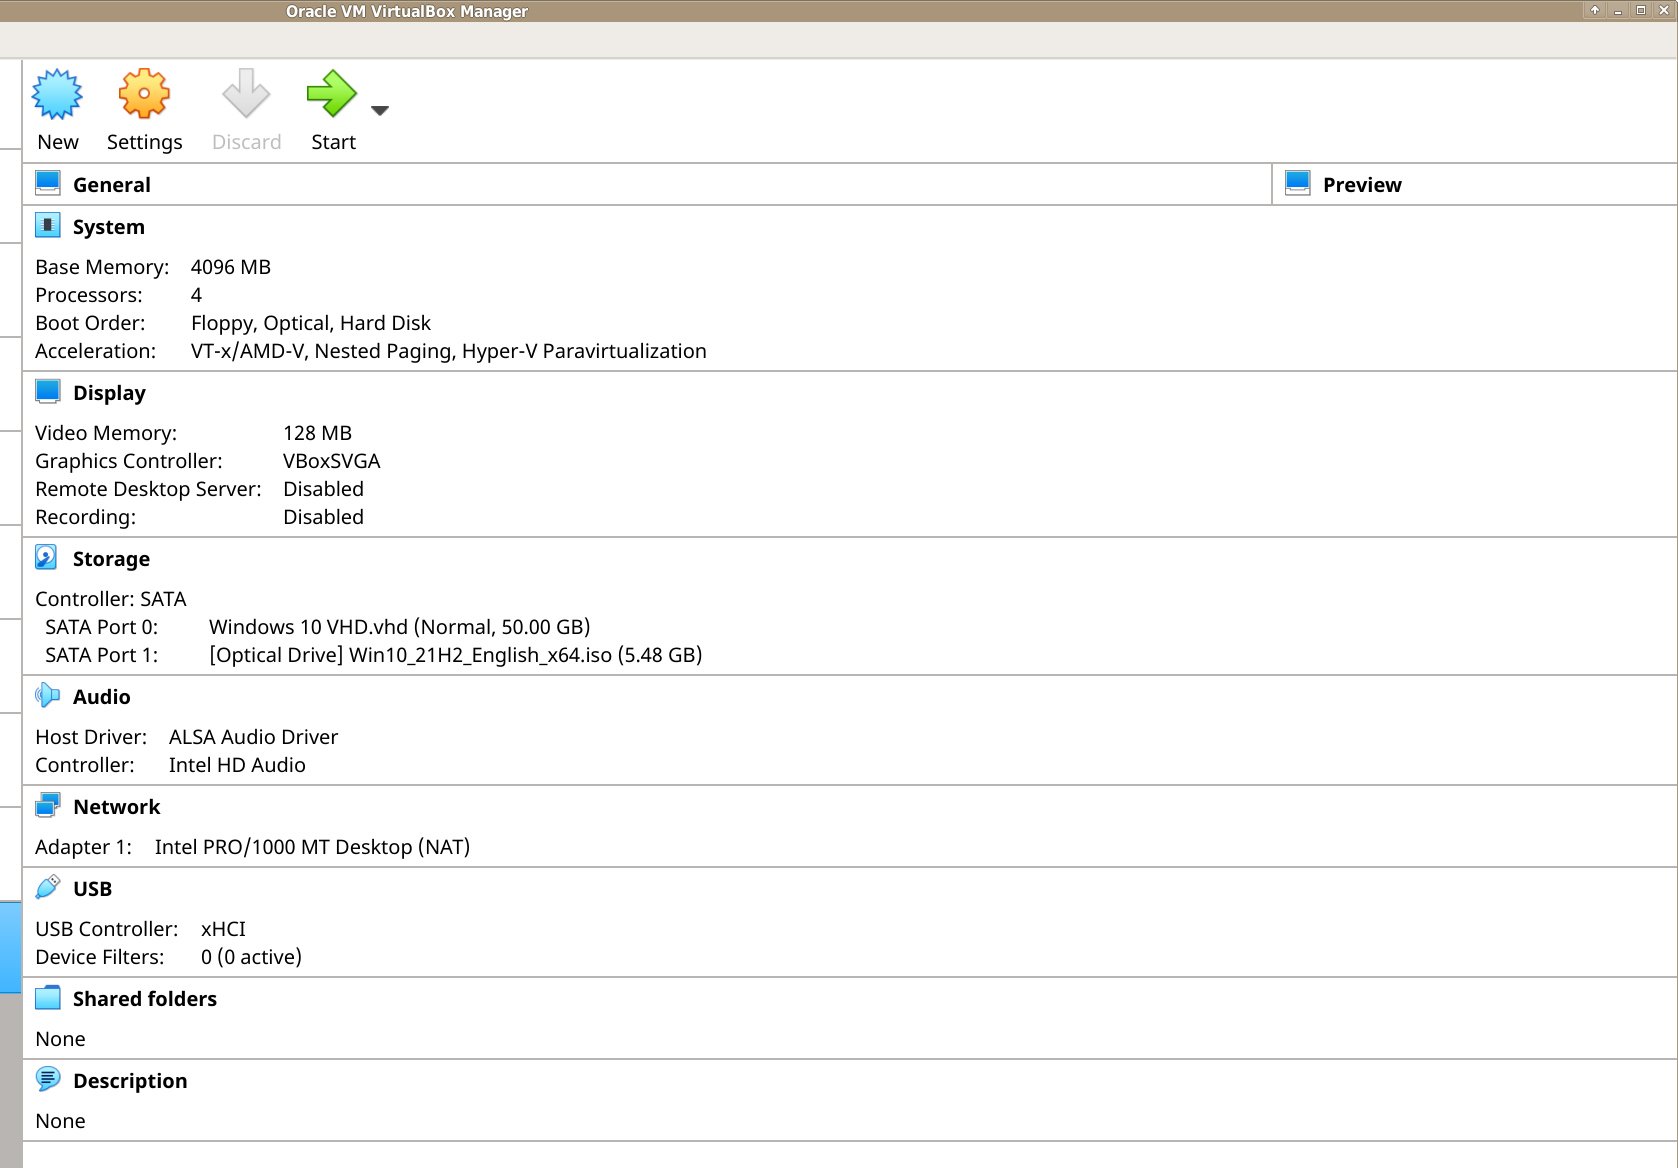
Configuration overview
Install Microsoft Windows
Start the virtual machine. Boot from the install ISO to install Microsoft Windows.
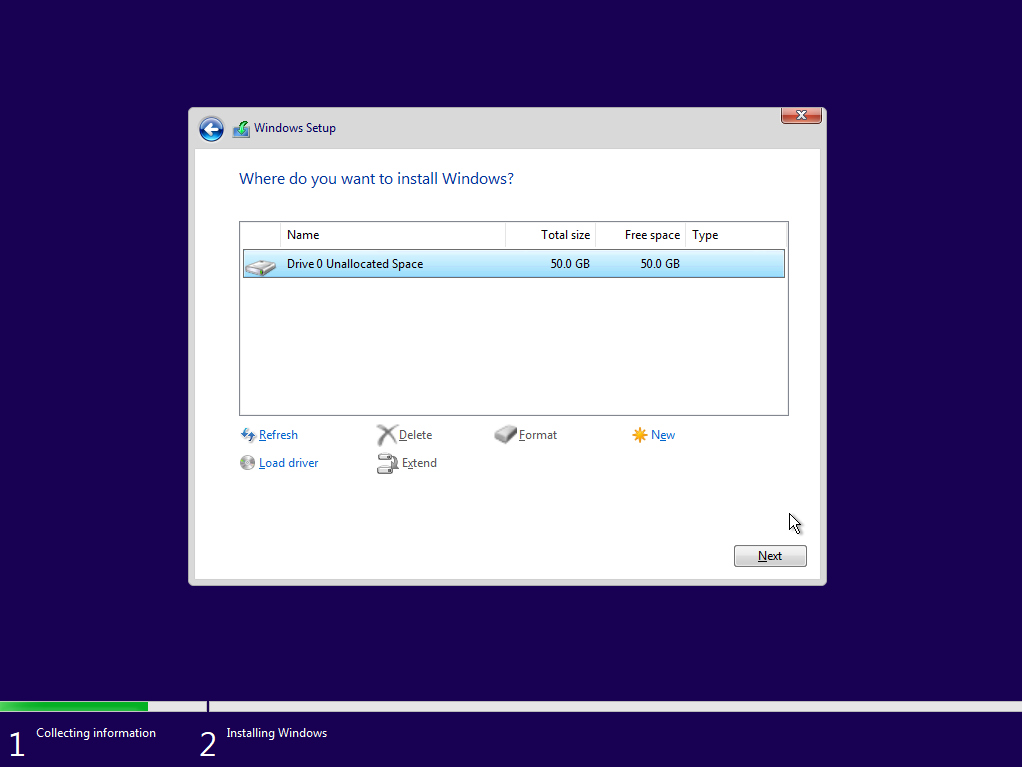
Install Microsoft Windows.

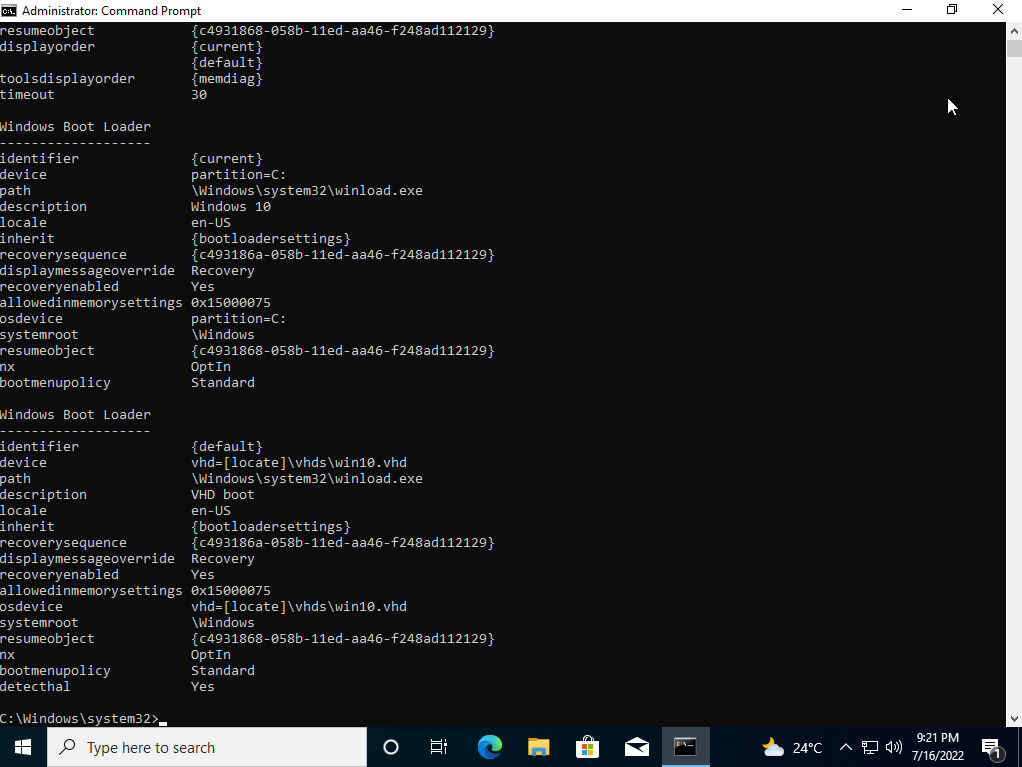
Windows Boot Menu
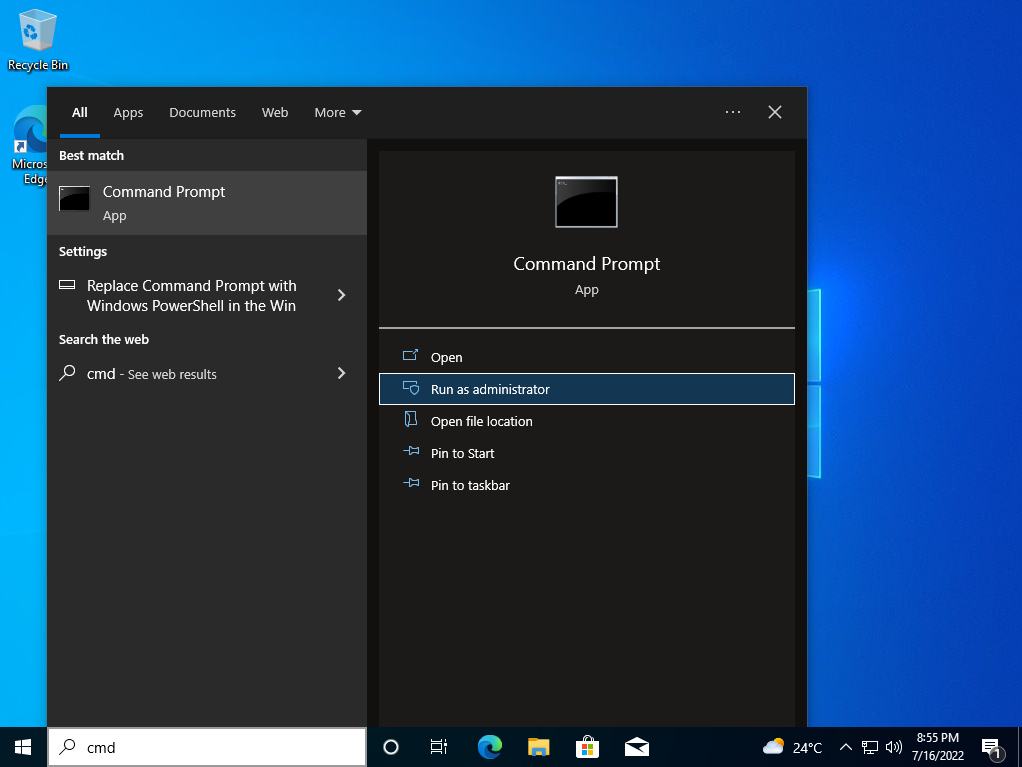
When you finished the installation, then start Microsoft Windows. Open the command prompt as administrator to add the VHD boot option to the Windows Boot Menu.
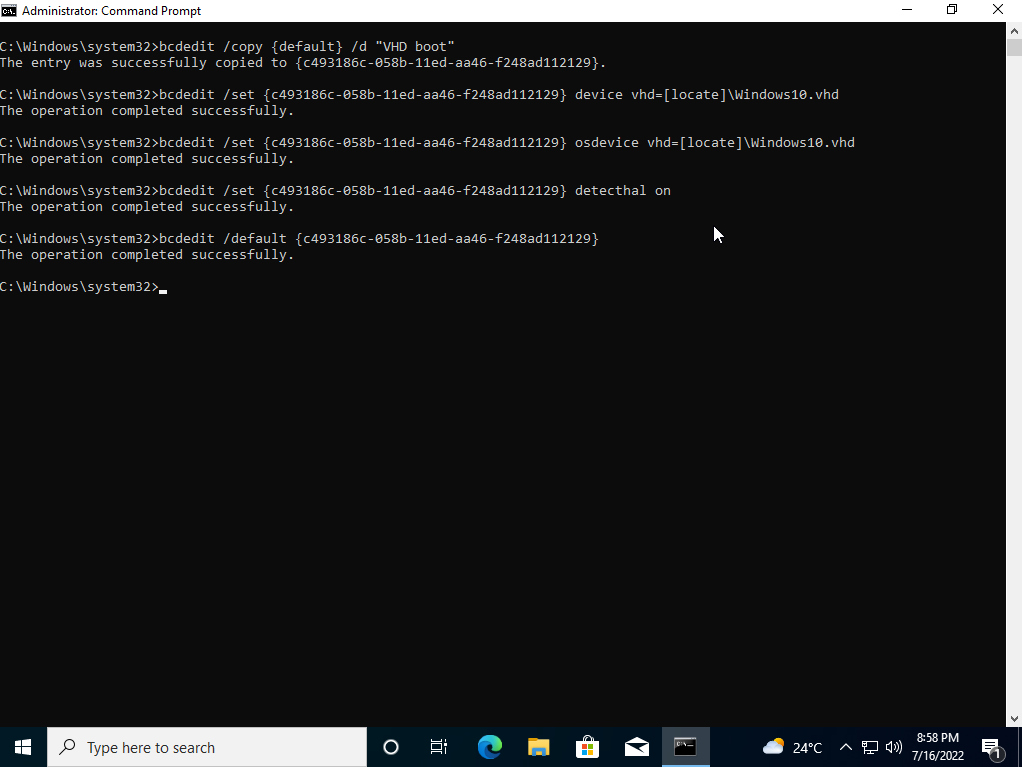
Create the VHD boot entry
bcdedit /copy {default} /d "VHD boot"
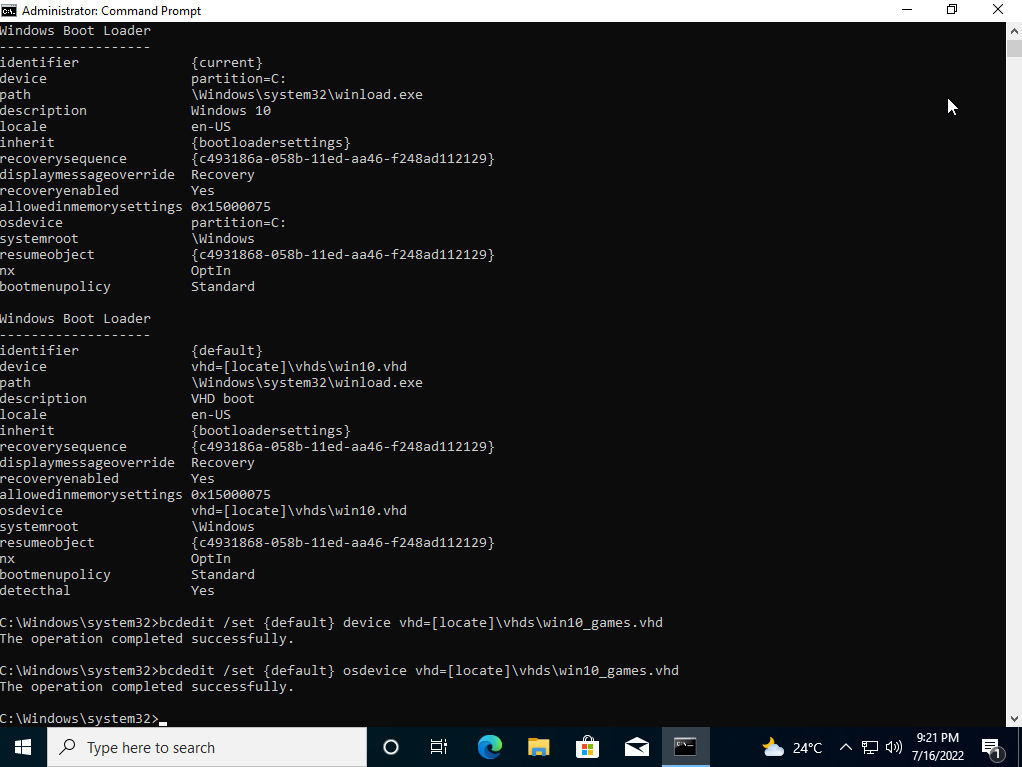
When the BCDEdit command is completed successfully, it returns a {GUID} as output in the Command Prompt window. See the screenshot below.
Copy the GUID, including the braces, to use it in the following steps.
Set the device and osdevice options for the VHD boot entry.
bcdedit /set {GUID} device vhd=[locate]\Windows10.vhd
bcdedit /set {GUID} osdevice vhd=[locate]\Windows10.vhd
Set the boot entry for the VHD as the default boot entry. When the computer restarts, the boot menu will display all of the Microsoft Windows installations on the computer. It is possible to boot from the virtual machine, or rather from the VHD file. In this case, both entries start the same Microsoft Windows installation. Since we want to boot from the VHD file later, we will configure the Windows boot menu so that after the countdown expires, the system automatically boots from the VHD file.
bcdedit /default {GUID}
Once you set the VHD boot entry as default, you can also use {default} instead of the long {GUID}.
Some x86-based systems require a boot configuration option for the kernel in order to detect certain hardware information and successfully native-boot from a VHD.
bcdedit /set {GUID} detecthal on
Overview

Now, the VHD is ready and you can shutdown the virtual machine. Copy the VHD file to an exFAT or NTFS formatted drive. Here, the VHD file is stored in "~/VirtualBox VMs/Windows 10 VHD/". The VHD file name is "Windows 10 VHD.vhd". With BCDEdit we used "\Windows10.vhd". So you have to copy the VHD file to the root directory of the destination drive and rename the file to "Windows10.vhd".
Start PBM6, mount the VHD file and boot.
PBM6 example video: The VHD file name in this video is "win10.vhd".
Various
You can change the location/file name of the VHD file.
Example: Setup for file name "\vhds\win10.vhd"
bcdedit /set {GUID} device vhd=[locate]\vhds\win10.vhd
bcdedit /set {GUID} osdevice vhd=[locate]\vhds\win10.vhd
Example: Setup for file name "\vhds\win10_gaming.vhd"
bcdedit /set {GUID} device vhd=[locate]\vhds\win10_gaming.vhd
bcdedit /set {GUID} osdevice vhd=[locate]\vhds\win10_gaming.vhd
Installation video of Microsoft Windows 10 + VHD Boot Menu Commands
External content blocked. Watch on YouTube
© 2026 by
Elmar Hanlhofer
This page was last modified on 24/10/2025.